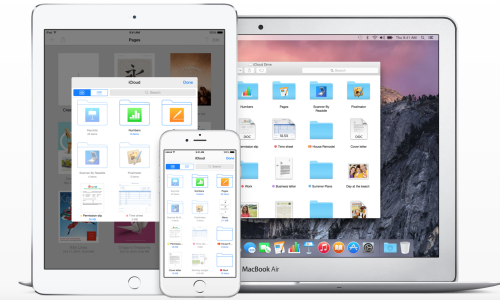
Data loss on iPhone/iPad often occurs from time to time. So backup your iPhone/iPad is necessary so that you can get your important data back when you dropped your iPhone to water, broke your iPad carelessly or upgrade to iOS 9. Thankfully there are many ways to store your information on the web or your PC or Mac, all of which are free and easy to use.

Method 1: Back up an iPhone/iPad: Creating an iCloud backup?
One of the simplest ways to back up the data on your iPhone is to use Apple’s own iCloud service.
1. Get an iCloud account with your Apple ID.
2. On your iPhone/iPad go to Settings > iCloud > Backup and you’ll see the option to toggle on iCloud Backup.
That’s it, you’re good to go. Now your phone will automatically look after your data without any need for you to get involved.
Method 2: Back up an iPhone: Using your PC and iTunes to back up
1. Plug your iPhone into your computer and open up iTunes.
2. Select File > Devices > Transfer Purchases. This will save all of the content you’ve purchased via the App Store or iTunes Store on your computer.
3. Wait for iTunes to finish transferring your purchases.
4. Select File > Devices > Backup.
5. iTunes will begin backing up your device. Depending on how much data you’re backing up, this could take some time.
After it’s finished, make sure it was a successful backup by heading into iTunes Preferences > Devices. You should see all of your backups with your device name and the date and time the process finished.
Method 3: Back up an iPhone/iPad: Upload iPhone/iPad backup to Google drive
Google Drive is a great place to backup a lot of content, mainly because of the 15GB of free storage you get with your Google account. That’s more than enough to handle important documents along with a robust photo library.
1. Download the Google Drive application for Windows or Mac.
2. Run Google Drive. It’ll ask you to sign-in and then run you through a fairly short setup wizard. Follow the steps, and click “Done” once you’re finished.
3. Google Drive should now be on your computer and the Google Drive folder it created will automatically open via your native file explorer.
4. Google Drive isn’t your traditional backup service, but it works just as well, mainly because of how simple it is to sync files. In your file explorer, head on over to:
For Windows users: Users/Username/AppData/Roaming/Apple Computer/MobileSync/Backup
For Mac users: Library/Application Support/MobileSync/Backup
5. Find your latest backup, right click it, press copy, select your Google Drive folder, and press paste. Your backup should now be uploading to Drive, and depending on internet speed and how big the backup file is, this could take some time
Method 4: Back up an iPhone/iPad: Backup iPhone/iPad with Dropbox
Easily the most well-known cloud storage provider these days is Dropbox. Basic users receive 2GB of space, which can quickly fill up. A Dropbox Pro plan costs $9.99 per month and gives you 1TB of space. That’s 50 percent less than Apple’s storage pricing, but there’s one substantial issue. Like the other non-Apple solutions, you’re unable to back up your entire device. Photo and video backups are a cinch – especially with the service’s Carousel app – but beyond that you’re out of luck. But if you ask users what they would want to backup on their device, a majority would easily say those irreplaceable memories.
Head on over to Dropbox.com, sign-up for an account, and download the correct version for your operating system. It’ll take you through the setup wizard, and once you’re done, just like you did above, you can copy your backups and paste them in the Dropbox folder, putting it in the cloud.
Method 5: Back up an iPhone/iPad: Put iPhone/iPad data to Hardware
If you’re really paranoid about losing data, even after you’ve put backups in the cloud, you can always go the traditional route and put backups on hardware, such as external hard drives and USB thumb drives.
It works virtually the same way as putting your data on the cloud. Only, instead of pasting the backup in your Google Drive or Dropbox folder, you’ll need to find your external hardware device in your file explorer and paste it in there.
Method 6: Back up an iPhone/iPad: Using Wondershre Dr.Fone for IOS
Wondershare Dr.Fone for iOS (Mac) is a free desktop backing up program. You can back up everything on your iPhone or iPad to your PC/Mac just with 3 click. And it is free.
1. Run Dr.Fone for iOS and connect your iPhone/iPad to your PC/Mac.
2. Choose “Recover from iOS devices” then click “Start Scan”.
3. When the data is listed on the left according to the categories, you can choose all then press on “Recover” to store the data to Mac/PC.
There are too many ways to make you backup your iPhone/iPad in case the data loss. Of course, you can only backup some photo, contacts instead of the whole data in your iPhone/iPad.
Free Download and Install iPhone Data Recovery


Free Download and Install Mac iPhone Data Recovery


Related Articles:


