Welcome to Delicate template
Header
Just another WordPress site
Header

The IFA 2014 saw a number of great gadgets being displayed and Sony didn’t stay out of the picture. Sony released details pertaining to the new flagship Xperia Z3 mobile electronics range. The 8-inch tablet, Z3 Tablet Compact measures in at a thickness of 6.4 mm while weighing under 270 grams and as per Sony is ‘the world’s slimmest and lightest waterproof tablet. Want to own one when it is on sale?

sony xperia z3 media transfer Transfer photos, music, videos to Sony Xperia Z3 from PC/Mac via USB driver

If you got one in future and truly love it, you may have urgent need to tansfer all your media contents (music, movies, photos or other files) from PC/Mac onto Xperia Z3, then how can you do it? Here we show you below on how to download and install the Sony USB drivers to get it done.

Before transferring, pls download and install Sony USB drivers or PC Companion first for Xperia Z3.

Step 1.Connect your Xperia Z3 and computer

Open the cover on the left side of your Xperia Z3.

cover Transfer photos, music, videos to Sony Xperia Z3 from PC/Mac via USB driver

Connect the data cable to the socket and to your computer’s USB port. Now wait for the computer to recognize the device. Several drivers including the modem, MTP service etc. will be installed automatically.

socket Transfer photos, music, videos to Sony Xperia Z3 from PC/Mac via USB driver

Step 2.Transfer files

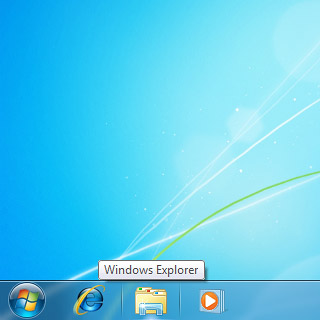
Start a file manager on your computer.

file manager Transfer photos, music, videos to Sony Xperia Z3 from PC/Mac via USB driver

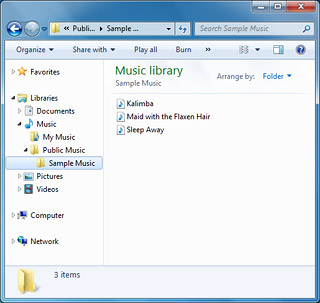
Go to the required folder in the file system of your computer or Xperia Z3.

the required folder Transfer photos, music, videos to Sony Xperia Z3 from PC/Mac via USB driver
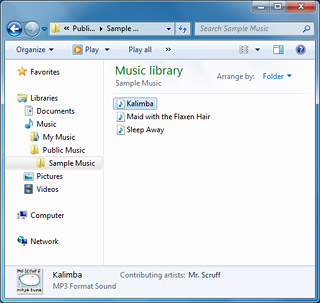
Highlight a file and move or copy it to the required location.

file in music library Transfer photos, music, videos to Sony Xperia Z3 from PC/Mac via USB driver

Now you have successfully transfer photos, music, videos to Xperia Z3 USB memory. That’s it! So easy!

Well, for the Xperia Z1 users, most of them would like move video files to Sony Xperia Z from computer for smooth playback. Then, the priority you need to concern is the Sony Xperia Z3 video format. From its specs, we know Sony Xperia Z3 video format is limited to MP4, H.264, H.263, WMV.

If you want to transfer unsupported videos to Xperia Z3 for playback, you need to change the format first. Here Pavtube Xperia Z3 Converter is a professional one to convert all popular video formats such as AVI, MPEG, WMV, DivX, MOV, RM, and VOB to format viewable on your Sony Xperia Z3, so powerful that it supports all mainstream tablet including but not limited to Xperia Tablet Z3. It makes the process to play Movie on Sony Xperia Tablet Z3 much easier. The mac version is Video Converter for Mac.

More related:

share medium Transfer photos, music, videos to Sony Xperia Z3 from PC/Mac via USB driver

 This guide mainly walk through the way to sync videos, music, photos from Mac to iPad Air. Simply follow this instruction to transfer media files to iPad Air in several steps!

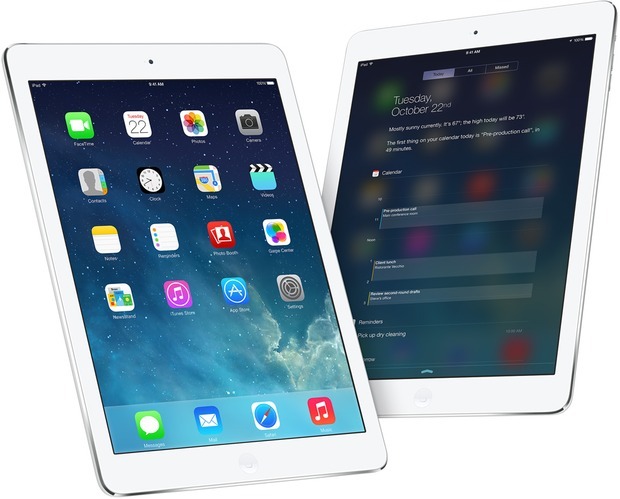
iPad created an entirely new mobile computing experience, and the new iPad Air is another big leap ahead. It is so thin, light and powerful, once you hold one in your hand you will understand what a tremendous advancement this is. It is Apple’s new full-size iPad that replaces the old 4th generation iPad. Want to sync your iPad Air with iTunes on your computer? Read the guide below to learn how to transfer media files from Mac to iPad Air with ease.
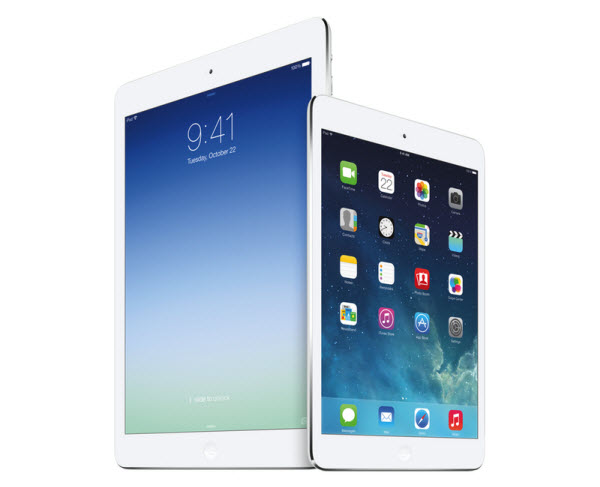
apple ipad air Transfer media files from Mac to iPad Air

At first, let’s see some advantages for syncing your iPad Air with a computer. 

1. Each day you sync your iPad Air, iTunes stores a backup of its content. You can restore all your data from these backups if you lose your iPad Air.

2. Syncing with a computer is the only way to get a large number of videos, music, photos from your collection on your iPad Air.
3. Note if you have a large collection of videos, music, photos, you can opt to copy only a selection of it to your iPad Air at any one time.

Tips you should now before transferring:

1. I you are on a Mac, you already have iTunes. All you need to do is run Software Update to make sure you have the latest version.

2. You might get a message on your Mac computer the first time you connect your iPad Air and open iTunes, asking if it is okay to sync your iPad Air to this computer. The message won’t reappear.

3. After connecting the first time, iTunes should automatically open when you connect your iPad Air. While connected, you can always resync to apply changes by clicking the Sync button in iTunes.

4. You can also check Sync over Wi-Fi connection in your iPad Air’s options in iTunes. This allows you to sync when your iPad Air isn’t connected by the cable. It only needs to be on the same network as your Mac that is running iTunes.

5. After your device is in sync, you can change some general options for your iPad Air from the Summary screen in iTunes. Most of the options are self-explanatory, such as Open iTunes When this iPad Is Connected.

6. One option that dramatically changes how your iPad Air syncs is Manually Manage Music and Videos, which turns off automatic syncing of music and videos and enables you to simply drag and drop songs and movies from your iTunes library onto the iPad Air icon on the left. (You might need to scroll down the Summary page to locate this checkbox if your screen size is too small to show the entire page at once.)

7. As we look at some of the syncing options for the iPad Air, the Mac version of iTunes is used as an example. The Windows version of iTunes is similar but not exactly the same. One difference is that on a Mac, iTunes syncs data with Mac applications such as Address Book, iCal, and iPhoto. On Windows, iTunes must find this data elsewhere.

How To Sync videos, music, photos from Mac to iPad Air

  • I. Syncing without wifi

1. Launch iTunes 11 from your Mac.

itunes mac Transfer media files from Mac to iPad Air

2. Plug in your device if you haven’t already.

3. In the upper right hand corner you will see your iPad Air appear. Click on the name of your device.

 Transfer media files from Mac to iPad Air

4. You will be taken to the summary screen. From here you can see a list of tabs along the top.
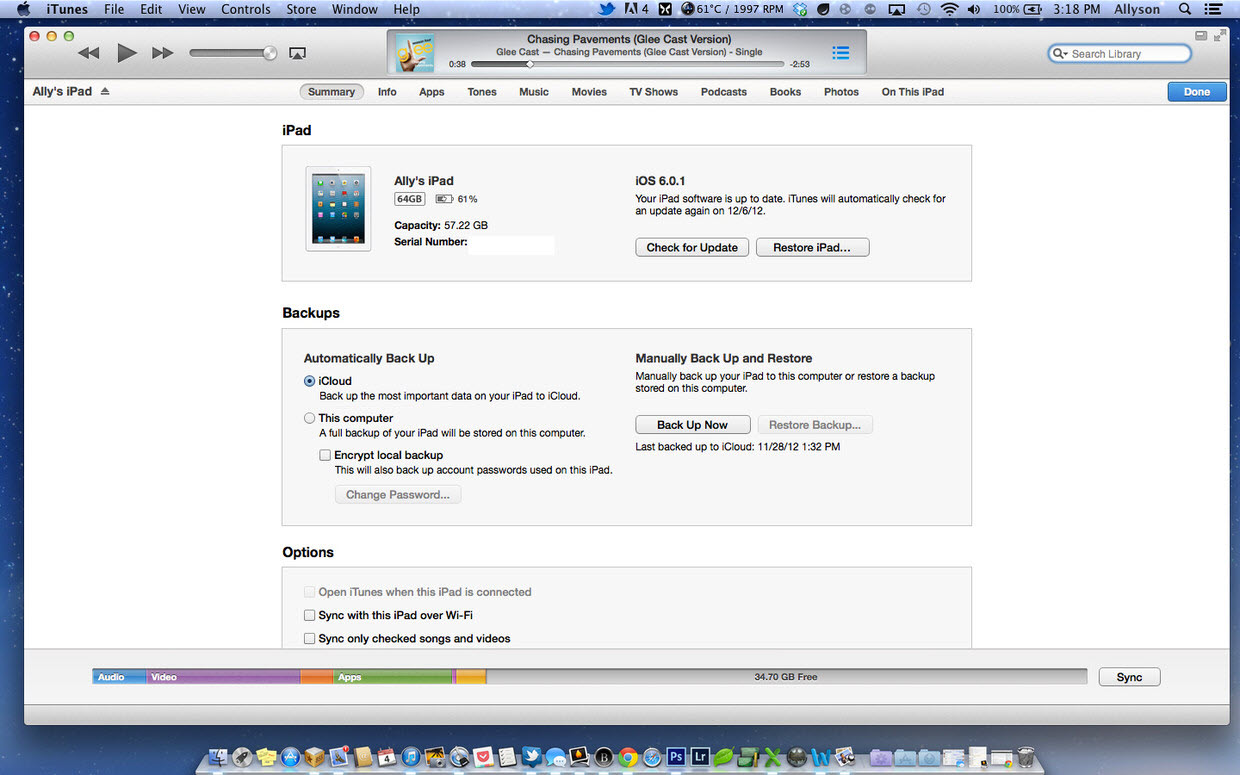
itunes 2 Transfer media files from Mac to iPad Air

5. Click on the tab for the type of media you’d like to sync to your iPad Air. You can choose from tones, music, movies, tv shows, podcasts, books, and photos.

6. Make sure the checkbox for the media type is checked and where applicable, select the media items you’d like to sync.
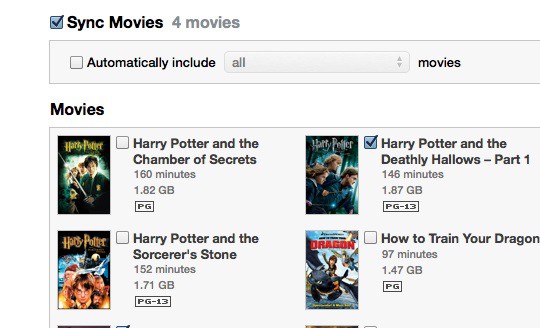
itunes 6 Transfer media files from Mac to iPad Air

7. Click the Apply button in the lower right hand corner after you’re done selecting all your media.
itunes 4 Transfer media files from Mac to iPad Air

8. Wait for iTunes to finish syncing your content before unplugging.

As with apps, to remove content such as a movie, book, or podcast, simply uncheck it. For music, you can even choose only specific playlists or songs.

  • II. Syncing over Wi-Fi 

If you have a strange aversion to cables and they make you cringe when you think about having to plug in to sync, iTunes also offers Wi-Fi sync which allows you to sync your device wirelessly.

1. Enable Wi-Fi sync

2. Launch iTunes 11 from your Mac.

3. Plug in your device if you haven’t already.

4.In the upper right hand corner you will see your iPad Air appear. Click on the name of your device.

5. You will be taken to the summary screen.

Under the Options section, turn On the option to sync your device over Wi-Fi by checking the box.
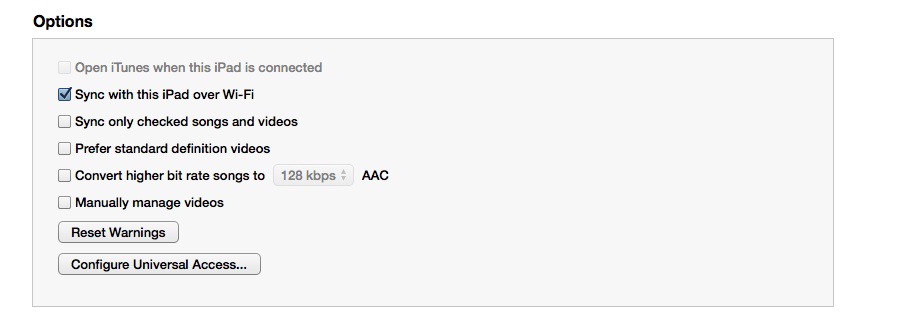
 Transfer media files from Mac to iPad Air

Click on the Apply button in the lower right hand corner to save your changes.

itunes 4 Transfer media files from Mac to iPad Air

You’ll now be able to apply changes to your iPad Air over Wi-Fi as long as you’re sharing the same Wi-Fi connection as your iPhone, iPad, or iPod touch.

Other options for iPad Air media transfer

1. Use a USB flash drive & the camera connection kit
Plug the USB flash drive with an SD card into your computer and create a new folder titled DCIM. Then put your movie/photo files into the folder. Now plug the flash drive into the iPad using the iPad Camera Connection Kit. Open the Photos app, the movie/photo files should appear and you can import media to your iPad Air.

NOTE: The files must have a filename with exactly 8 characters long (no spaces) plus the file extension (i.e., my-movie.mp4; DSCN0164.jpg). And when using certain digital cameras or SD cards, you may be unable to delete images from the device. In these situations, the Delete option will not appear.

2. Transfer media to iPad Air wirelessly via iCloud
iCould is a wireless service to help iOS users to transfer documents, music, videos, etc between iOS devices and PC/Mac. With iCloud, you can watch movies, read books, and listen to music anywhere you are.Tips for synchronizing unsupported videos/movies to iPad Air

1. If you want to copy videos to iPad Air in other formats like MKV, WMV, AVI, FLV, MTS, M2TS, MOV, MPEG, MPG, MOD, TiVo, VOB, etc, you will need reformat these video files first. You can try this professional iPad Air Video Converter  (20% off) to batch convert videos in various formats up to 1080p to iPad Air playable format (e.g. MP4).

2.If you have the intention to transfer Blu-ray, DVD movies as well as your personal HD video files to iPad Air, you’d better get the best all-in-one video convert tool Video Converter Ultimate (20% off) to have fastest and most effective conversion.

Related articles:

Rip/Stream Blu-ray movies to Apple iPad Air
Transfer and Play DVD movies on iPad Air with Decent Quality
How to play 1080P/720P HD Videos and Movies on iPad Air
share medium Transfer media files from Mac to iPad Air

Just bought the new iPad Air? Has it ever occurred to you that it is troublesome to transfer videos from iPad Air to computer because Apple need to keep iTunes customers from copying DRM files. Well, we have some easy solutions.

ipadair How to Transfer Videos from iPad Air to Computer

Everyone knows Speaking at today’s launch event in San Francisco, Phil Schiller announced the next iteration of the company’s tablet. It’s thinner, lighter and more powerful — hence the new name: the iPad Air Air. (No more of that “new iPad Air” nonsense.) And Cupertino takes that moniker seriously; this slate weighs just one pound (down from the fourth-gen model’s 1.4 pounds). When you need to backup and transfer videos from iPad Air to your PC computer or Mac, how to do it?

My friend gave me a suggestion, he said that maybe you can transfer movies to iCloud. First,you can backup your ipad air movies to the iCloud, and then you can extract movies from iCloud to your Computer, this is a good way!

Sometimes you want to transfer some data to computer for backing up or watch or edit videos on computer! So here we will tell you how to transfer videos and music from iPad Air to computer, no matter whether them are purchased from iTunes or not!

Transferring with iTunes and iCloud

This method is for transferring those purchased videos and music from iTunes.

With iTunes

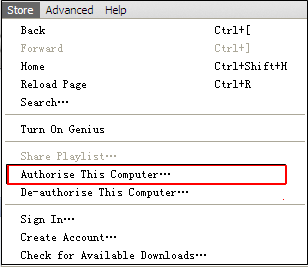
1. To make sure to authorize your computer before connecting iPad Air, follow the steps (“Store“menu, choose Authorize Computer and enter Apple ID and password).

authorise How to Transfer Videos from iPad Air to Computer

2. Connect your iPad Air to the computer.

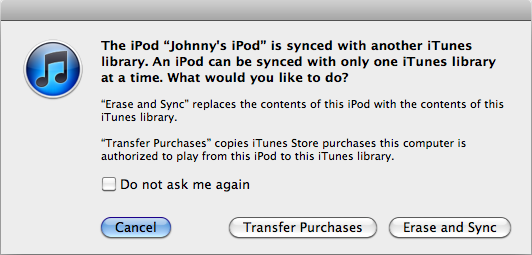
3. Click the Transfer Purchases button.

You can right-click (Windows or Mac) your device in the iTunes Source list, then choose Transfer Purchases from the shortcut menu that appears.

transfer How to Transfer Videos from iPad Air to Computer

If you connect your iOS devices for the first time, one dialog may appear automatically as follow , you just click the Transfer Purchases button.

sync issue How to Transfer Videos from iPad Air to Computer

With iCloud

iCloud is a wonderful service for sharing or backing up your data, so you also can transfer videos and music with it. First of all, you should share your data onto iCloud. Then you need to download from iCloud again to computer. In addition, it requires lots of wireless data to finish the process. So if transferring with iCloud, you have better make sure the Wi-Fi is available for your iPad Air.  It is teach you How to transfer movies iPad air to your Computer. You can try it for free. Good luck!

Having many halloween video collections, want to convert these movie files to your iPad Air for playback, now follow the artcicle below:

Rip/Convert Blu-ray Movies for enjoying on iPad Air
Convert MKV, AVI, Tivo, VOB, WMV, MPG, FLV to iPad Air
Transfer and Play DVD movies on iPad Air
Get Sony 4K XAVC/XAVC S Files onto iPad Air for playback 

share medium How to Transfer Videos from iPad Air to Computer