Welcome to Delicate template
Header
Just another WordPress site
Header

Lots of people want to watch Blu-ray movies on their Macs. Until now, though, doing so required ripping the movies to your hard drive and playing them that way or use some Blu-ray Player for Blu-ray movies enjoying.

One of Steve Jobs’s most memorable comments may be the way he referred to Blu-ray as “a bag of hurt” back in 2008 during a Q&A with members of the press:

“I don’t mean from a consumer point of view—it’s great to watch movies—but the licensing is so complex. We’re waiting until things settle down and Blu-ray takes off in the marketplace before we burden our customers with the cost of the licensing and the cost of the drives.”
bluraymac How do I play a Blu ray Disc on my Mac

As Macs users well know, things haven’t settled down (at least not from Apple’s perspective). Four and a half years after that comment, OS X still doesn’t support Blu-ray playback, nor has any Mac shipped with a drive capable of even reading or burning data on a Blu-ray disc. And given that few Macs even include optical drives these days, Apple’s never going to bring Blu-ray to the Mac. (The company can already sell you HD movies and TV shows directly from the iTunes Store, so why would Apple want to embrace Blu-ray?)

While Blu-ray was in its early days when Jobs made his “bag of hurt” comment, the format has come a long way, and the Blu-ray disc is holding its own in the marketplace. True, people still buy more DVDs than Blu-ray discs, but that could change in the next few years.

And even though downloading HD movies is easy, there are several reasons to buy Blu-ray discs. The picture quality is better (with higher bit rates and less compression), as is the audio (with several different mixes for multichannel systems). If you lack a fast Internet connection (or are subject to bandwidth caps from your ISP), it may be quicker and easier to buy a Blu-ray disc than wait to download a file that might top out at 8GB. Also, even with digital extras included with many movies now, you don’t get the full complement of bonus content you do with a disc. Finally, an optical disc is a good, hard-copy backup.

Sold on Blu-ray yet? Then it’s time to learn how you can watch and even rip Blu-ray discs on a Mac.The hardware portion of the equation.

The first step to be able to play Blu-rays on a Mac is to purchase a Blu-ray drive. You can get an external, USB Blu-ray drive for less than $50, though you might want to look around the $80 to $100 range to find a good one. (The cheaper models are usually from unknown vendors and often get poor reviews from users.) Many of these models are bus-powered, so you don’t need a power supply; just connect them to a Mac that has powered USB ports, and you’re up and running. You won’t need any special drivers to mount the Blu-ray discs, but once they’re mounted, there’s not much you can do with them.
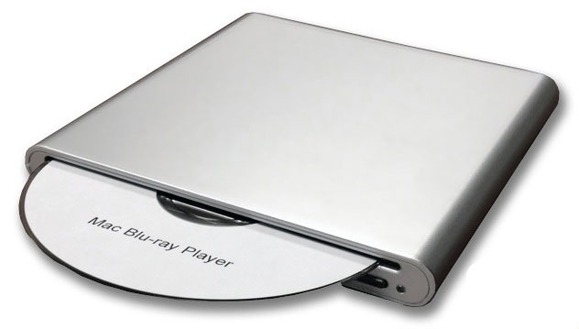
mce br How do I play a Blu ray Disc on my Mac

MCE Technologies’ $79 USB Super-BluDrive includes Blu-ray playback software for your Mac.

MCE Technologies sells a USB Super-BluDrive for $79, which includes software that can play Blu-ray movies (the same program I’m going to look at below, Mac Blu-ray Player). OWC also offers both internal and external Blu-ray drives, but you’ll need to bring your own software to the party.

Bear in mind that a Blu-ray drive can also play DVDs and CDs. So if you’re planning to get an external drive to connect to a Mac that is devoid of such a device, think about getting one that includes Blu-ray support.

Blu-ray playback software

At first blush, there are a number of different Blu-ray playback software options for Mac users. But if you take a closer look, you’ll discover that they are often the same software but with different monikers, sold by companies with different names.

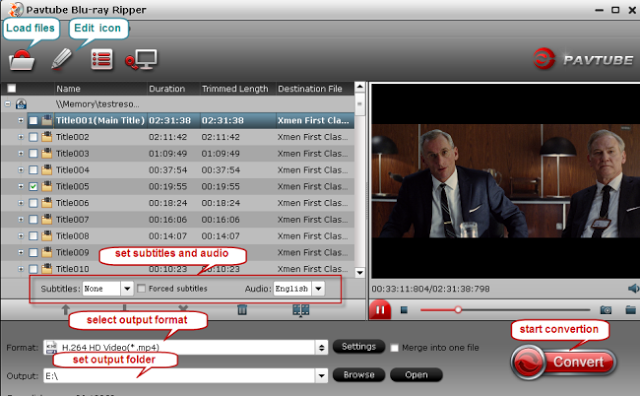
  • 1. Pavtube Blu-ray Ripper for Mac. It is the program I’m using. I purchased it because it can rip any blu-ray disc to many video formats. This software is very affordable, and worth each dollar. I use this software to rip my blu-ray collection to mkv and mp4 format so that I can watch the movies many times without having to insert a blu-ray disc in my computer each time. I have not had any problems with this software, it is very stable.blu ray ripper How do I play a Blu ray Disc on my Mac

The program is easy to use for editing and conversion and makes great quality copies of my Blu-rays and DVDs. It can help you rip Blu-ray discs to any popular video formats such as MP4, AVI, FLV, WMV, 3GP as well as any popular audio formats such as AAC, AC3, MP3, OGG and WAV. Designed for fast speed and negligible video quality loss, this amazing software is your best choice for Blu-ray ripping  on Mac. It also enables you to copy Blu-ray disc contents without any quality loss by removing Blu-ray copy protections. It has added 3D profiles in Format menu. (Side-by-Side, Top-Bottom, or Anaglyph 3D in MKV/MP4/MOV/WMV/AVI). In colusion, it is an all-in-One Blu ray tools: Blu-ray Ripper, DVD Ripper and 3D Blu-ray Ripper on Mac.

  • 2. DVD Fab Blu-ray Ripper for MacI tried the trial version of DvdFab Blu-ray ripper, but I did not buy it as Pavtube Blu-ray ripper can do the same things and it more affordable. Theonly feature I would like pavtube to add, is an option to rip blu-ray discs to mkv with DTS audio. I love the option to crop the blu-ray videos, so you can remove the black borders that are on many blu-ray movies. I highly recommend Pavtube blu-ray ripper, and want to give this software 5 stars rating. Pavtube are very good at what they do.
  • 3. Most of you are likely familiar with the excellent Handbrake for ripping standard Def DVDs (HandBrake does not rip or decrypt commercial DVDs), but while the latest version of the software has added SOME support for reading Blu-Ray folder structures, it cannot yet decrypt the Blu-Ray discs the way it can with regular DVDs, so you’ll need to add an intermediate step.
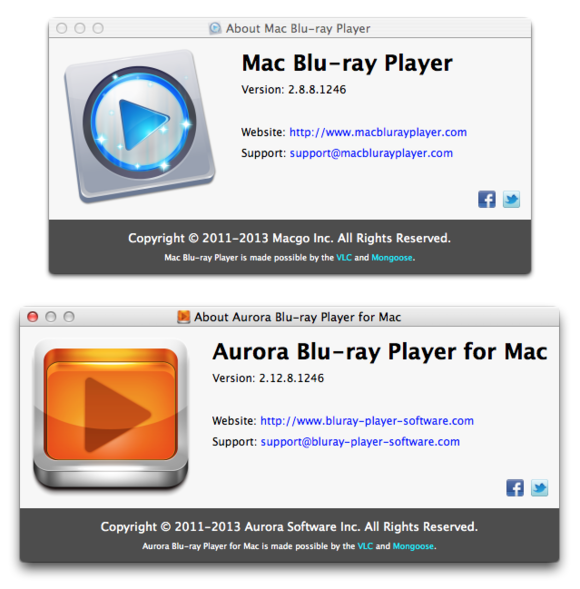
  • 4. Aurora Software’s Blu-ray Player ($30 for a one-year license or $40 for lifetime usage) and Macgo’s Mac Blu-ray Player ($60 for a lifetime license, but discounted to $30 until July 1).about blu ray How do I play a Blu ray Disc on my Mac

These two About boxes look surprisingly similar. That’s not the only way these two programs are alike. In my testing, I found the interfaces to be exactly the same, aside from some different colors. The Preferences windows are the same; the About boxes are nearly the same, too, with just a slight difference in version numbers. This kind of similarity is common with DVD, Blu-ray, and other types of video-conversion software. For simplicity, I’ll focus on Mac Blu-ray Player. (Note that Mac Blu-ray Player is due for a 3.0 update soon; I tested version 2.8.)

First, you should be aware of a couple of things. Because the software needs to acquire the decryption keys required for playback online, you need an Internet connection for it to work. Second, registering the software imposes constraints. When I registered Mac Blu-ray Player on my laptop, I couldn’t use it on my desktop Mac. And, when I switched the registration back to my desktop Mac, the software told me I had activated it two out of five times. As the company’s website explains it:

There are five times each year for Macgo registration code activation. If registration code activation is outnumbered, it will present a tip “Registration failed. Your registration code activation limit is reached.”

  • 5. Mac Blu-Ray PlayerExecutive Editor Jonathan Seff looked at Mac Blu-Ray Player about two years ago, and found it quirky and unreliable. Since then, the company has definitely improved the software. When you insert a Blu-ray disc in a drive and launch the software, it detects the disc and displays a spartan “menu.”

menu How do I play a Blu ray Disc on my Mac

Mac Blu-ray Player can’t reproduce the menus on a Blu-ray disc; instead, it presents this limited display. Sometimes, there is no cover art, just a generic Blu-ray logo.

In watching half a dozen Blu-ray movies with the software (all recent releases, ranging from Sucker Punch to a just-released disc of Bach’s “St Matthew’s Passion”), I encountered none of those early problems with playback or stability. Video playback was smooth, with no artifacts, in both a window and in full-screen mode. Audio was similarly fine, although the app crashed once when I turned on subtitles for a movie that wasn’t in English. I tested the app on both a late 2011 Mac mini (2.7GHz Intel Core i7 with 16GB of RAM) and an early 2013 MacBook Pro (2.5GHz Intel Core i5 with 8GB of RAM), using my Plextor PX-B120U 4X Blu-ray drive (discontinued but still available for around $100 online).

The software offers the standard play/pause controls, but also lets you skip forward or back in 30-second chunks; change audio track and subtitle synchronization; adjust brightness, saturation, contrast, gamma, and hue; and much more. I found nothing lacking in the software’s functionality.

Ripping Blu-rays

In addition to simply playing your Blu-ray movies on your Mac, you may want to copy them to your Mac to watch on your laptop when traveling, or convert to a format you can watch via an Apple TV, for example.

[Editor’s note: The MPAA and most media companies argue that you can’t legally copy or convert commercial DVDs or Blu-rays for any reason. We (and others) think that, if you own a disc, you should be able to override its copy protection to make a backup copy or to convert its content for viewing on other devices. Currently, the law isn’t entirely clear one way or the other. So our advice is: If you don’t own it, don’t do it. If you do own it, think before you rip.]

There are two methods you can use. The first involves decrypting and copying the entire disc to an .iso disc image. This file will be the same size as the original Blu-ray—about 30GB to 40GB—so you may run into space issues pretty quickly. I used Pavtube Blu-ray Ripper for Mac Software’s free Blu-ray Copy, and this app copied my Blu-ray discs in roughly real time; a 2-hour movie took about two hours to copy. You can then play the copy by mounting the disc image, and using Mac Blu-ray Player. In that app, choose File > Open File, or click Open File in the main window, and select the BDMV file in the disc image. You can also open BDMV files with the free VLC Media Player.
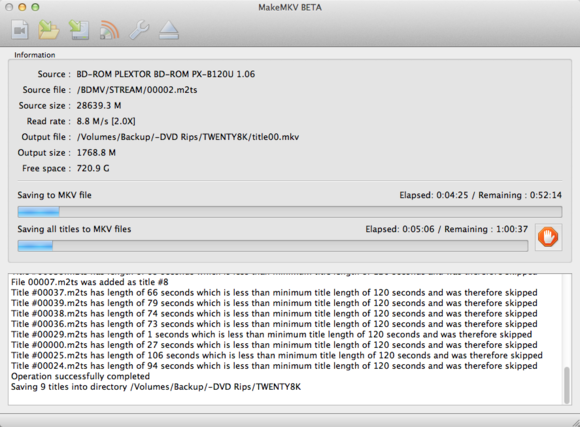
makemkv How do I play a Blu ray Disc on my Mac

MakeMKV can rip Blu-ray discs and create MKV files, that you can play back on your Mac.

The second method is to make an MKV file (MKV is a file container format that can hold video, audio, picture, and subtitle tracks in a single file). Using GuinpinSoft’s MakeMKV—free while in beta, which it has been for several years (visit this forum thread to find the current temporary beta key)—you can decrypt a Blu-ray disc and save whatever parts you want (if you don’t need the 7.1-channel audio mix, for example, just uncheck it) into an MKV container. This takes about half the duration of the movie; when the decryption is finished, you have an MKV file that you can play back with VLC or other software. If you want more manageable file sizes, you’ll need to convert the MKV to a smaller file—in the same format, or in a different format, such as an iTunes-compatible MP4—using a tool such as HandBrake.Into the blu

That’s pretty much all there is to it. You may encounter certain discs that don’t work due to new and varying copy protection, but in general the process is pretty easy if you’re willing to invest a little time and money. Among all, I like Pavtube of course, the software works like most other Blu-ray Rippers I’ve used and the process is straightforward. Pop in your disc (Note: A BD drive is needed for ripping Blu-rays), choose the optimized output for your device, and start the conversion on Mac now!

Read more:

2013 Top 5 Blu-ray Ripper Review
How to enable Surface 2/Windows 8.1
Rip Blu-rays to MP4 for Kindle Fire HDX 7/8.9

share medium How do I play a Blu ray Disc on my Mac

If you are on the hunt for some Kindle Fire HDX tips and tricks then check out supply. We have some short guides and advice on getting more from your Amazon tablet.

Amazon’s Kindle Fire HDX comes in two flavors. The 7-inch version isA duking it out with Google’s Nexus 7 and Apple’s iPad Mini, while the 8.9-inch version takes on the iPad Air and the Nexus 10. No matter which model you have, we’ve got some suggestions and short guides to help you get the most out of your hardware. Take your pick of the Kindle Fire HDX tips and tricks on offer. These tips apply to the Kindle Fire HD as well, unless otherwise stated.

amazon kindle fire hdx Helpful Tips and Tricks for Kindle Fire HDX

Before we get started, here’s how to take a screenshot on the Kindle Fire HD. You may also want to check out our Kindle Fire HDX problems and solutions.

Updated on 10-28-2013[b] by Simon Hill:[/b] Made a lot of updates to the article to address the newly launched Kindle Fire HDX tablets, added how to use Mayday feature and how to add ebooks as well.How to use Mayday on the Kindle Fire HDX

kindle fire mayday Helpful Tips and Tricks for Kindle Fire HDXOne major difference between the HDX tablets and everything else on the market speaks to Amazon’s commitment to customer service. Your first port of call for any Kindle Fire HDX issue is going to be the built-in Mayday feature. It will connect you to an Amazon representative who can potentially access your tablet and fix any problems that you have encountered. Just swipe down from the top of the screen and tap the Mayday icon at the top right (it looks like a life preserver and it’s clearly labeled). You should see a pop-up window with an Amazon advisor inside it within a few seconds. You’ll be able to see them, but don’t worry, they can’t see you. They’ll also have to ask permission before they can access anything potentially personal on your tablet.How to add ebooks
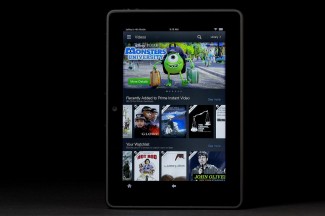
The Kindle Fire HD and HDX support various ebook formats. The proprietary Amazon Kindle AZW format is best, but KF8, TXT, PDF, or unprotected MOBI files will all work as well. If you want to add ebooks to your Kindle Fire HDX from outside of Amazon, then just download them in a supported format, and put them in your Books folder, and they’ll appear under your Books tab. You can use a free app like ES File Explorer to move files around on your tablet.

If you have a collection of ebooks on your computer, or you can only find an ebook you want in an unsupported format, then you should grab the free Calibre software. It can be used to convert your ebooks into the AZW or MOBI format.How to get rid of ads

The temptation of that rock bottom price tag may have persuaded you to opt for the “With Special Offers” version of the Kindle Fire HDX. That’s simply Amazon’s way of describing advertisements and if you find yourself getting sick of them quickly, you are not alone.

You can get rid of the “special offers” by shelling out $15. Go to Amazon, sign into your account, and go to Manage Your Devices. Under Special Offers click Edit, click next to Subscribed, click next to the device, and then review the price and click Unsubscribe.

You can also turn off recommendations by going to Settings > Applications > Amazon Home Recommendations and set to Hide.How to install apps from outside Amazon’s Appstore

One turn off with the Kindle Fire HDX is the fact that you don’t have Google Play access on your device and are limited to the choice of apps and games in the Amazon Appstore. There are over 700,000 apps out there for Android, but only a small proportion of them are in the Amazon Appstore and it doesn’t include Google’s apps. You could root your device, but you’ll void the warranty and there is a better way. Before you enable installation of apps from other sources, you should consider installing a good Android security app.

Pull down the notifications bar and hit More to access Settings > Device and then set Allow Installation of Applications From unknown sources to On. You can now sideload APK files onto the device. You can download them to your desktop and copy them over or send them by email, or you can just go direct to websites that stock APK files on your Kindle Fire HDX. Check out our list of alternative Android app stores for some places to start.

If you have an Android phone or another device with access to Google Play, you can download the apps and games you want to that device, and then back them up and copy them over to your PC using a file explorer app. You can then Allow Installation of Applications on your Kindle Fire HDX and install something like the free ES File Explorer app. Copy them over to your Kindle Fire HDX from the PC and then use the file explorer to find them and install them. You can also use DropBox to easily share APK files wirelessly.How to lock screen rotation

kindle fire hdx front videos Helpful Tips and Tricks for Kindle Fire HDXYour Kindle Fire HDX screen should rotate automatically when you turn the device and flick between portrait and landscape. Some apps have a locked orientation in one mode or the other. You can also lock the orientation yourself. Pull down the notifications bar and tap the Locked orUnlocked option at the top left of the Quick Settings.How to enable security and parental controls
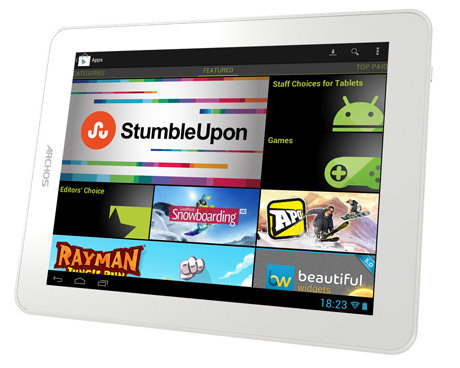
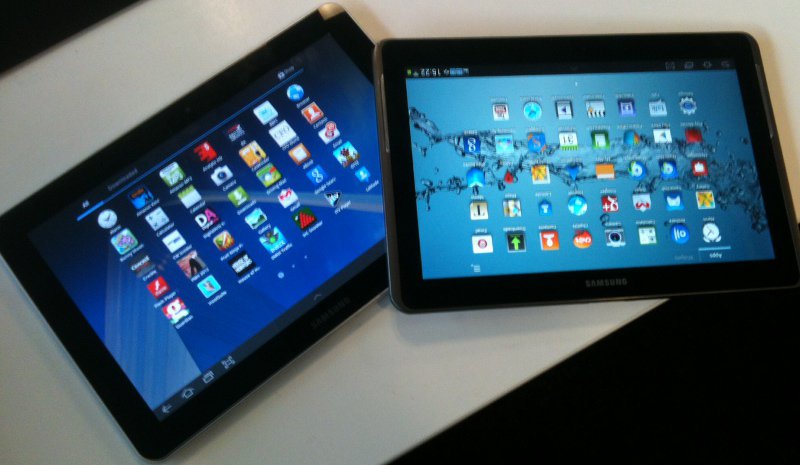
You can enable basic security for your device by setting up a lock screen password. Simply pull down the notifications bar and hit More > Security and turn Lock Screen Password to On, then pick the password you want and hit Finish. You can also set up more security to block access to specific content, restrict purchases, set up different profiles, or even set time controls by using the parental controls. They give you a fine degree of control over the device.

Basic Parental Controls can be found in the same Settings menu via More in Quick Settings when you pull down the notifications bar, but this will set controls for the device whoever is using it.

If you want more fine control and multiple user accounts, go into your apps and fire up Kindle FreeTime. You’ll find a host of options to carefully control your child’s access to content on the device, but you could also use it to set up a guest profile and keep some of the Kindle Fire HDX off limits for other people.How to watch Kindle Fire HD content on your HDTV

One advantage the Kindle Fire HD has over the Nexus 7 is the ability to plug it into your HDTV with the right cable. You can then watch some content on your big TV. Be warned, though, that some services like Hulu Plus or HBO Go will not allow you to output content from the Kindle Fire HD to a TV.

Buy a Micro HDMI to HDMI cable like this one, which is only $9 and plug it in.

The Kindle Fire HDX doesn’t support an HDMI cable connection like this, but there is a feature called Second Screen coming in November, which will allow you to share content via Wi-Fi. Your Kindle Fire HDX will serve as a second screen for additional information and as a remote control, while the content plays on your compatible Samsung TV or PlayStation 3. Support for thePlayStation 4 is reportedly in the works, but that’s it for now. We’ll update you with full details on how to use it when this feature goes live.How to install Flash

If you want to be able watch Flash videos, you’ll need to jump through a few hoops. The native Silk browser does not support Flash, so you’ll need a new browser as well.

Go to More via the notifications bar and tap Device. Then turn Installation of Applications From unknown sources to On. Now you’ll need a file explorer app, ES File Explorer is free. Find Dolphin HD and Flash Player APK files online. Now load the APK files onto your Kindle Fire HDX, use the file explorer to find them and tap to install starting with Dolphin and then Flash Player.How to get more storage

If the 16GB or 32GB of built in storage isn’t enough then you can expand your space with cloud services or even hardware. You can get 5GB for free with Amazon Cloud Drive. Music you have bought through Amazon should be available via the Amazon Cloud Player, but you can use the Amazon Music Importer found here to upload some of your own music (250 songs for free).

You could also try another cloud service like DropBox, SugarSync, or Box. You could even consider buying an external hard drive like the Kingston Wi-Drive which also has a companion Android app to install on your Kindle Fire HD.How to access the camera on Kindle Fire HD

You’ll notice that the front-facing camera is available if you start up Skype or some other apps like Evernote and Facebook, but is also possible to use it without them. If you have installed the free ES File Explorer app discussed above then you can go to AppMgr > Category > System apps > Camera and tap Open to get access to normal camera, panorama and video options.How to root your Kindle Fire HD

If you do decide to smash out of Amazon’s walled garden then you’ll be voiding your warranty, but it will also allow you to access lots of extra content and tweak the device in ways that are impossible with an unrooted Kindle Fire HD. There is always some risk involved in rooting so make sure that you follow instructions to the letter if you’re going to give it a try (it’s not very difficult really). The best place to go for advice and guides on rooting is undoubtedly XDA Developers. You’ll also find APK files and customized ROMs there.More Kindle Fire HDX tips

If you have any Kindle Fire HDX tips or tricks of your own then please post a comment and share them.

From: digitaltrends.com

share medium Helpful Tips and Tricks for Kindle Fire HDX

Here are the 14 best tablets available to buy in the UK right now.

With so many new tablets being launched in 2013, it’s hard to keep up with them all. It’s even harder to know which ones are any good. Well fret not: we’ve got that covered with this handy chart where we rank and review the 14 best tablets available to buy in the UK right now.

When buying a tablet there are a few things you need to keep in mind. First of all you need to consider the operating system. The current options are Apple’s iOS, Google’s Android OS and Microsoft’s Windows 8 OS. (Amazon’s Kindle Fire range and Barnes & Noble’s Nook tablets run a highly customised version of Android.)  If you’re unsure about which operating system is right for you, read our iPad, Android, Windows 8, BlackBerry tablets buying advice article. Once you’ve bought your tablet, you can’t change your mind about these fundamental things.

If you’re not familiar with all the tech jargon, a tablet’s specifications can be very confusing. However, rather than ignore them, it’s worth bearing these key areas in mind. In general, higher is always better.

Look out for a tablet’s screen resolution and pixel density (quoted in ppi); the internal storage (GBs); expandable storage (typically via a microSD card slot); and other features you might want such as cellular (3G or 4G) connectivity, GPS, Bluetooth, video outputs (such as HDMI) and more.

If you plan to use the tablet for taking photos and videos, how many megapixels do the camera(s) have?Anything below around 5Mp should be avoided, but check the sample photos and videos in our reviews to find out what the quality is really like.

Finally, there’s battery life. You don’t want your tablet to last less than around six hours, and the recharge time is worth knowing, too. Some tablets take almost as long to charge as they do to discharge.

To find out more about what to look out for take a look at this feature: which tablet should I buy?

The 14 best tablet of 2013:

14. Archos 80 Titanium

Archos 80 Titanium Google Play Best 14 Tablet 2013: Which tablet to buy?

  • Reviewed on: 20 March 13
  • RRP: £130 inc VAT
  • Ratingstars small 8 Best 14 Tablet 2013: Which tablet to buy?

The Archos 80 Titanium proves that you can get a decent tablet without breaking the bank. Its screen isn’t high resolution, but it’s a good IPS panel which matches the iPad mini for half as much. Performance is also good, as is build quality; only the cameras let the side down. If you’re on a tight budget or want a tablet for your kids, this is a great choice.

13. Samsung Galaxy Tab 2 10.1

galaxy tab 2 Best 14 Tablet 2013: Which tablet to buy?

  • Reviewed on: 29 August 12
  • RRP: £299 inc VAT (£419 inc VAT for 3G version)
  • Ratingstars small 7 Best 14 Tablet 2013: Which tablet to buy?

A year ago we liked the Tab 10.1, and for the second generation the hardware specs remain broadly the same, and the Samsung Galaxy Tab 2 10.1 has a much better operating system. All for £100 cheaper than it was. We love the bright screen, and adding SD support and 1080p video capture are both improvements. The problem is the competition: the Nexus 7 in particular has changed the game for Android tablets, and is a little more than half the price of the Tab (albeit with a smaller screen, half the storage and no front-facing camera). Meanwhile the iPad remains a cut above for £100 more than the Tab 2 10.1. If you absolutely require a 10in Android tablet, you could do a lot worse than the Tab – especially at this price. But also consider the Asus Transformer series of devices, and the Toshiba AT300 which at only £30 more than the Galaxy Tab 2 10.1 offers a quad-core processor.

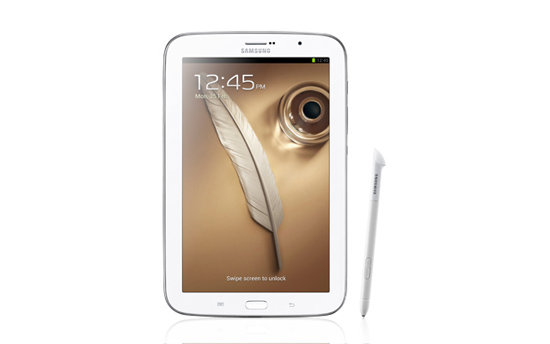
12. Samsung GalaxyNote 8.0

Samsung Galaxy Note 8 review 1 Best 14 Tablet 2013: Which tablet to buy?

  • Reviewed on: 16 July 13
  • RRP: £339 inc VAT
  • Ratingstars small 7 Best 14 Tablet 2013: Which tablet to buy?

The Galaxy Note 8.0 is one of Samsung’s better tablets but it’s hampered by its extravagant price tag. Unless you really want the S Pen stylus there are better and cheaper 8in-screen tablet alternatives on the market.

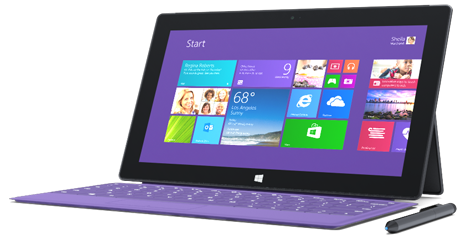
11. Microsoft Surface Pro 2
Microsoft Surface Pro 2 Best 14 Tablet 2013: Which tablet to buy?

  • Reviewed on: 24 October 13
  • RRP: £719 inc VAT
  • Ratingstars small 7 Best 14 Tablet 2013: Which tablet to buy?

The Surface Pro 2 crams a serious amount of power into a compact frame – enough to worry the latest Ultrabooks. Its design may be spot on for some but we can’t help feel that instead of being the best of both laptop and tablet worlds, it’s neither. The price quickly rises if you veer away from the base model – many people would be better off with a separate laptop and tablet, and you might even save money. Those less bothered about the tablet side of things should consider a convertible device.

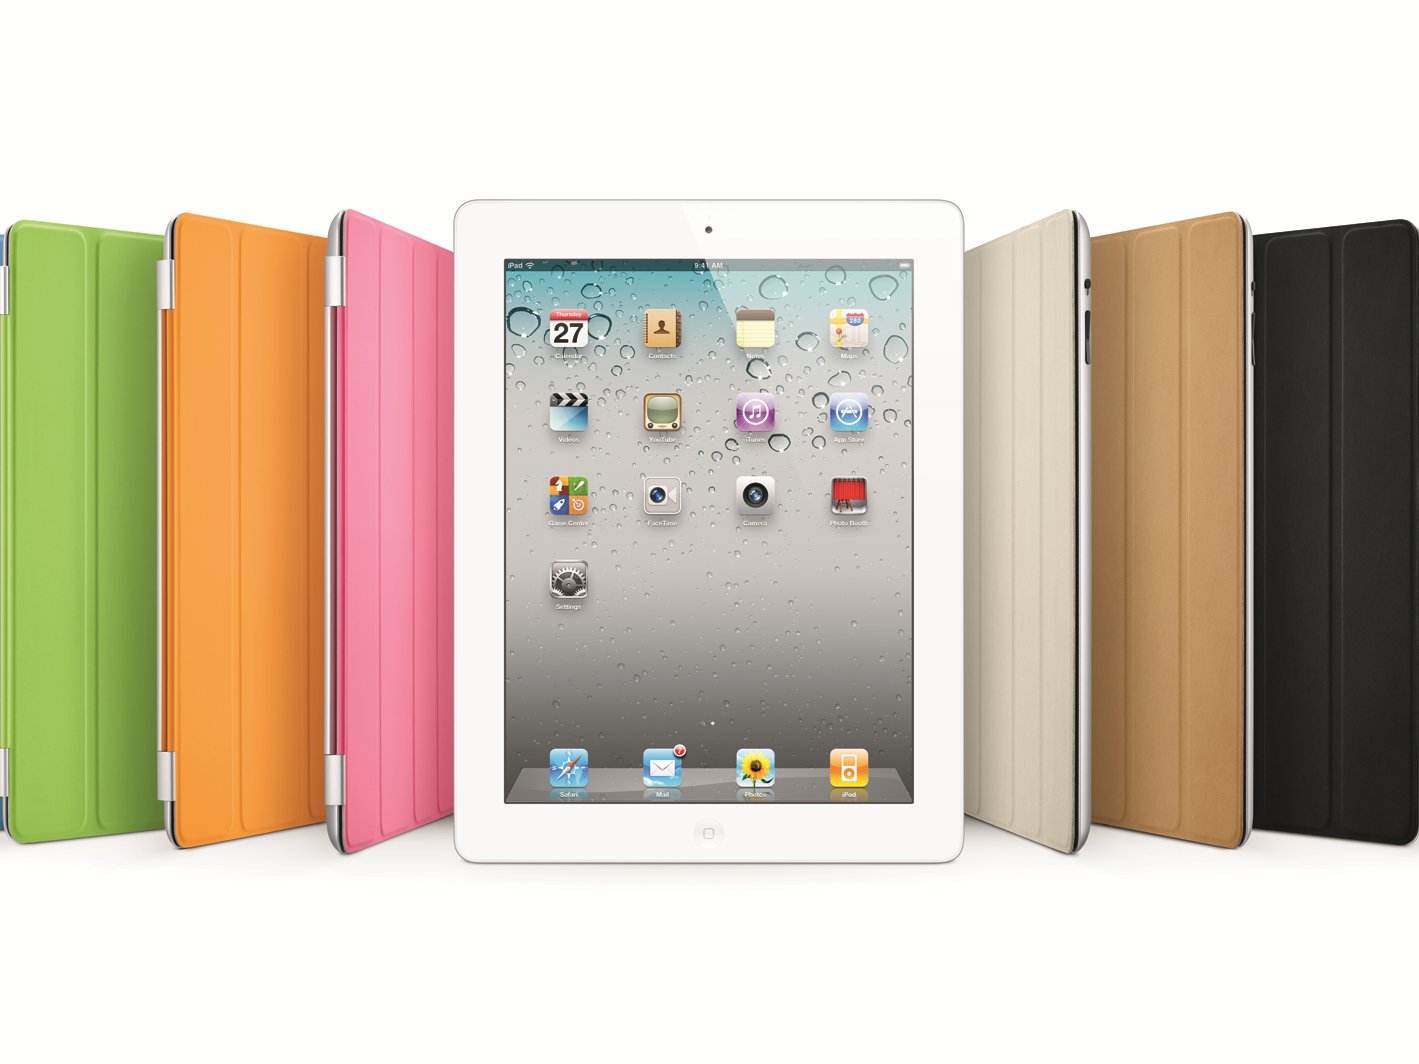
10. Apple iPad 2
Apple iPad 2 Best 14 Tablet 2013: Which tablet to buy?

  • Reviewed on: 18 April 11
  • RRP: £329 for 16GB Wi-Fi-only model; £429 for 16GB Wi-Fi plus cellular model. No other storage capacities available
  • Ratingstars small 9 Best 14 Tablet 2013: Which tablet to buy?

Still available as the cheapest full-sized iPad, the second-generation Apple tablet remains a classic – better than almost all Android devices.

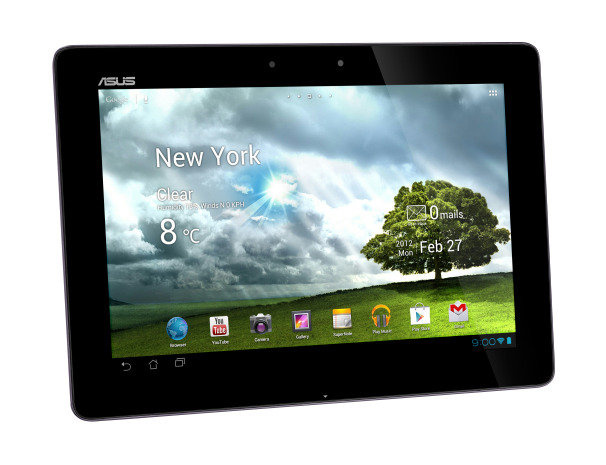
9. Asus Transformer Pad Infinity TF700

asus transformer pad infinity tf700 Best 14 Tablet 2013: Which tablet to buy?

  • Reviewed on: 26 June 12
  • RRP: Around £400 inc VAT
  • Ratingstars small 9 Best 14 Tablet 2013: Which tablet to buy?

The Asus Transformer Pad Infinity TF700 takes over from its predecessor as the top Android tablet available. You get high performance mixed with high style, and you don’t have to make a lot of sacrifices to get both. Other tablets – including the Prime, which is expected to drop in price once this model gets into the market – may provide better value, but no other Android tablet will give you the full package that the Infinity does.

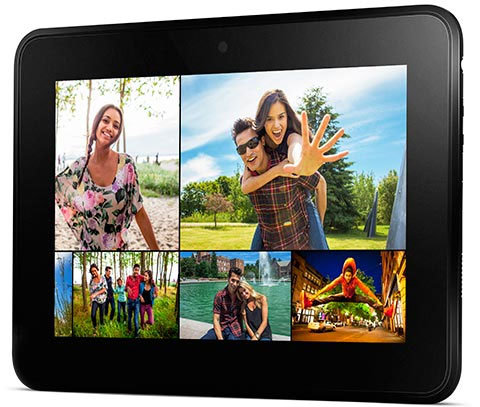
8. Amazon Kindle Fire HD

Fire HD Best 14 Tablet 2013: Which tablet to buy?

  • Reviewed on: 4 October 13
  • RRP: £159 inc VAT
  • Ratingstars small 7 Best 14 Tablet 2013: Which tablet to buy?

The Kindle Fire HD wasn’t the best 7in tablet whenit launched in 2012, and even at the new lower price, it can’t really compete with newcomers including Tesco’s Hudl. The Fire HD locks you into Amazon’s world, which still lacks the breadth of choice compared with Google Play.

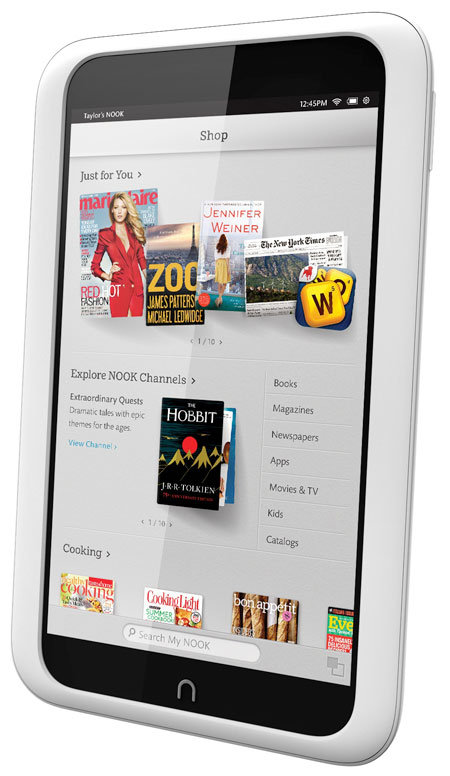
7. Barnes & Noble Nook HD
nook hd shop Best 14 Tablet 2013: Which tablet to buy?

  • Reviewed on: 6 June 13
  • RRP: £159 inc VAT
  • Ratingstars small 8 Best 14 Tablet 2013: Which tablet to buy?

We can hardly find fault with the hardware, but UK-specific content – including magazines, newspapers, books and apps – is sorely lacking. Much is promised, but you’re taking a risk if you jump in and buy a Nook HD right now. As with the Kindle Fire HD, the Nook HD will be good option for anyone wanting something that’s easy to use, and there’s the bonus of user profiles as well. However, if you don’t want to be completely locked in to the Nook store, you’re better off with a Nexus 7 at this price.

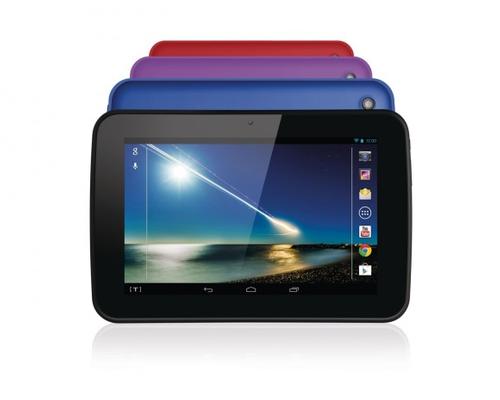
6. Tesco Hudl

Hudl colours front thumb Best 14 Tablet 2013: Which tablet to buy?

  • Reviewed on: 15 November 13
  • RRP: £119 inc VAT
  • Ratingstars small 8 Best 14 Tablet 2013: Which tablet to buy?

The Tesco Hudl is a budget tablet with a nice design and good build quality. Key specifications are better than the price tag suggests such as the processor and good quality 7 in screen. A microSD card slot and Micro-HDMI port are two reasons to opt for the Hudl over Google and Amazon alternatives.

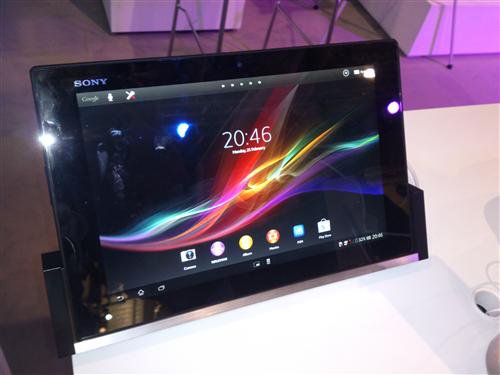
5. Sony Xperia Tablet Z

Sony Xperia Tablet Z Best 14 Tablet 2013: Which tablet to buy?

  • Reviewed on: 14 June 13
  • RRP: £399 inc VAT
  • Ratingstars small 8 Best 14 Tablet 2013: Which tablet to buy?

Sony has made a very desirable tablet in the Xperia Tablet Z. We particularly like its striking svelte design and features that you don’t get with rivals such as NFC, its waterproof casing and infrared. However, its slightly lacking performance means the Nexus 10 will save you some money or the iPad 4 will give you a smooth experience for the same price.

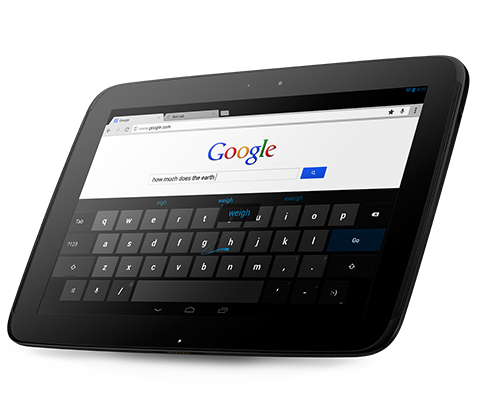
4. Google Nexus 10

Google Nexis 10 tablet Best 14 Tablet 2013: Which tablet to buy?

  • Reviewed on: 2 July 13
  • RRP: £319 for 16GB; £389 for 32GB
  • Ratingstars small 9 Best 14 Tablet 2013: Which tablet to buy?

The Nexus 10 is easily the best 10in Android tablet we’ve seen to date. It has a fantastic screen, decent cameras and software features all for a more than reasonable price. Those looking for an alternative to the full-sized iPad needn’t look any further.

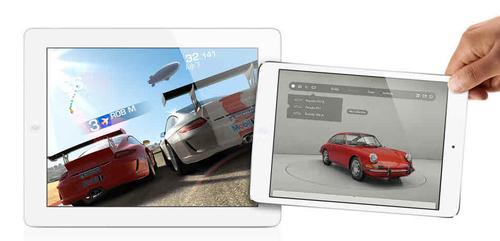
3. Apple iPad mini

ipad mini body image thumb Best 14 Tablet 2013: Which tablet to buy?

  • Reviewed on: 24 June 13
  • RRP: Wi-Fi: £269 (16GB), £349 (32GB), £429 (64GB)
  • Ratingstars small 8 Best 14 Tablet 2013: Which tablet to buy?

The iPad mini is a premium small tablet, with a price to match. It’s a shame Apple couldn’t have included a Retina screen and newer processor – expect the iPad mini 2 to get those updates when it launches later this year. This Wi-Fi only model also lacks GPS. It’s not cheap by any stretch, especially if you want more storage spare or the 3G/4G cellular version, but it’s great value compared to a full-size iPad. You can save a chunk by buying a Nexus 7, Nook HD or Kindle Fire HD, but if you must have an iDevice, it won’t disappoint.

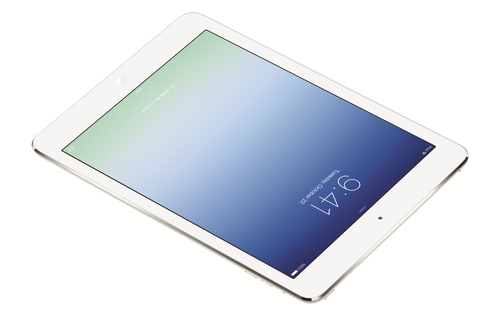
2. Apple iPad Air

iPadAir DiamondLockScreen PRINT thumb thumb Best 14 Tablet 2013: Which tablet to buy?

  • Reviewed on: 18 November 13
  • RRP: Wi-Fi: £399 (16GB), £479 (32GB), £559 (64GB) and £639 (128GB). Cellular: £499 (16GB), £579 (32GB), £659 (64GB) and £739 (128GB)
  • Ratingstars small 8 Best 14 Tablet 2013: Which tablet to buy?

In many respects a triumph, the iPad Air also introduces compromises to hit the low-weight/thin-case targets. Sound quality through the new stereo speaker has deteriorated, and although a matter of taste we found the iPad mini-style case loses the premium feel of preceding generations of iPad. The iOS 7 interface, not popular with every user, cannot be avoided on this device and it suffers some stickiness in app zooming. Ultimately though the iPad Air will suceed by simple nature of its new weight – the lose of almost 200g is so significant to its handling, and means it could encroach on E Ink ebook readers; only with the power and versatility, not to mention gorgeous colour screen, of a real iPad.

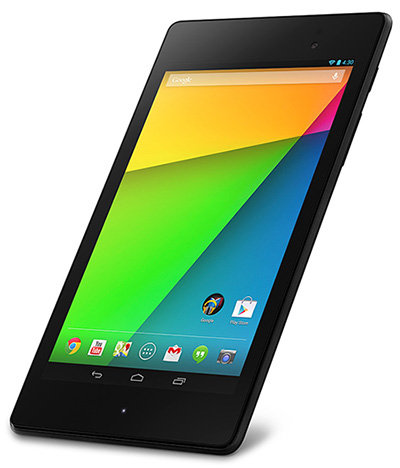
1. Nexus 7 (2013)

newxus 7 2013 Best 14 Tablet 2013: Which tablet to buy?

  • Reviewed on: 23 August 13
  • RRP: £199 (32 GB)/£239 (1 32GB)
  • Ratingstars small 9 Best 14 Tablet 2013: Which tablet to buy?

The Google Nexus 7 (2013) is more expensive than the original but sees a small change in the design, while its exceptional screen and added rear camera help justify this price hike. It’s still lacking a microSD card slot but for many people with be the best 7in tablet around. We now await the challenge of the Apple iPad mini 2.

share medium Best 14 Tablet 2013: Which tablet to buy?

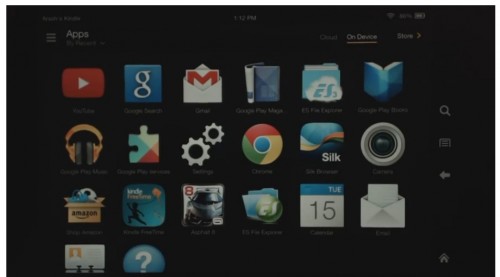
What is a pity is that Kindle Fire HDX doesn’t add support for Google apps. So here offers you some tips and trick for the way for installing Google Apps on the Kindle Fire HDX. Just get the solution now.


Kindle Fire tablets HDX 7 and 8.9 inches, are a real bargain considering the provision incorporating hardware. The cons always come from the so closed software for your operating system modified. Although we install most existing Android applications, the applications Google are not. An Android enthusiast has been able to bring Gmail, Play Music, Google Maps, YouTube, Chrome and other applications. Kindle Fire HDX sports a high resolution screen, a very fast processor, and generally excellent media abilities, but one thing it lacks is support for Google apps.

Luckily for us Amazon still lets users install apps downloaded from sites other than the Amazon Appstore, because one blogger going by Android Cowboy has found a way to add Gmail and a few other Google apps to Amazon’s tablet.

His trick is similar to the hack which let me install Gmail, Google Reader, and other Google apps on the Kindle Fire HD last year. He’s gotten Gmail, Google Play Books, Chrome, and Google Search working on the Fire HDX, but at this point Google Play Store and Google+ still don’t work.

kindle fire HDX google apps How to Install Google Apps on the Kindle Fire HDX

Here’s how you do it.

First, you’ll need a file manager or some other way to access the install files on your Kindle Fire HDX. Amazon won’t let you do this via their setup, unfortunately, so I recommend that you head over to this post and install the 5 apps I suggested for the Kindle Fire HD. Or you could skip that and install ES File Explorer, an app which you can find in the Amazon Appstore on your Fire HDX.

Download the following files and transfer to your Kindle via USB connection to your PC. I suggest that you copy them to the “download” folder of the Kindle Fire HDX; it will be the easiest to find again.

Open the ES File explorer app and then open the download folder. Select and installGoogle Account Manager.
If you are prompted by a warning that app installs are blocked, follow the prompts to go to the settings menu and change the appropriate setting. Then go back to ES File explorer and try to install Google Account Manager again.
Reboot your Kindle Fire HDX by pressing and holding the power button and then selecting the shutdown option. Then restart it.

Install Google Services Framework.
Reboot.
Install Google Play Services.
Reboot.
Install Gmail.
Reboot.

At this point you should be able to open the Gmail app and log in to your account. You can ignore any warning messages.

Once you’ve logged into your Gmail account you can then download and install other Google apps. If you need help finding the apps, check out the 1Mobile app store. That is one of the better sources of free apps, including reading apps, utilities, and even Google apps.

Last year I reported on a similar trick which let me add Google apps to the Kindle Fire HD, but unfortunately it turned out to be less useful than I had hoped. The Kindle Fire HD (2012) didn’t support notifications and running Google apps in the background, and as a result some apps (Gmail, for example) would only check for new content when they were open.

I am concerned that the HDX might have the same issue. I’d love to hear back from anyone who tries this. How well did it work? Hope it helps~

Source: The Digital Reader

Read more:

Convert and Play DVD on Kindle Fire HDX 7/8.9
Download, Transfer and Sync media Files to Your Kindle Fire HDX

share medium How to Install Google Apps on the Kindle Fire HDX