Welcome to Delicate template
Header
Just another WordPress site
Header

In this article, I will give you a list of the top 5 free subtitle editor tools. Now get the best one to add subtitles for get more enjoyment with your video editing workflow.

What are subtitles?

Subtitles are textual versions of the dialog in TV programs, movies, animes, etc., usually put at the bottom of the screen. People who can’t understand the spoken dialogue could still know what is playing by watching subtitles. It’s also a good way to learn foreign language by adding subtitles. There are two common types of subtitles – softsub and hardsub, which are added to MP4 videos temporarily or permanently with different software. Hard subtitle is added to MP4 video in this article. As for the softsub, they can be display while playing with compatible media player. For example, when you’re using VLC Media Player to watch MP4 video, you’re able to load subtitle from Video > Subtitle Track > Load File.

If either your native language or the film you’re trying to view is a tad less popular, your chances for success drop drastically. There are many subtitle tools which can help you add and edit video subtitles. Time to improvise with the top 5 free subtitle editor tools as below at hand.

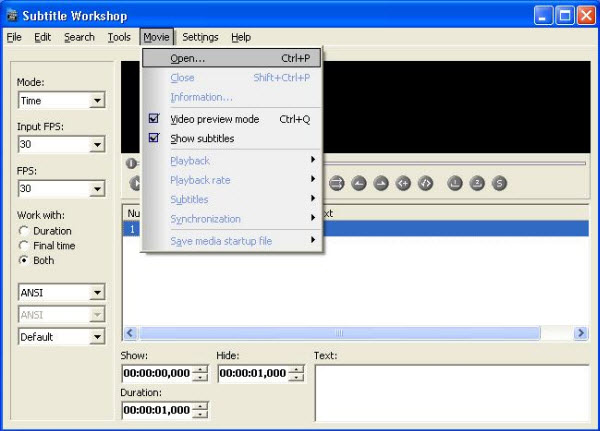
Subtitle Workshop

This is one of the often used tools to add subtitles to video which is available on the World Wide Web. Its creator makes it sure that this subtitle editor can be used in creating and editing subtitles. Aside from its basic features, this program also has added features such as an intuitive platform which is accompanied by easy to use menus, a faster editing speed, and a spell check function. It also fixes some of its bugs from previous version. Moreover, this is a great tool to have from novice users to expert.

subtitleworkshop Best free Tools To Edit & Adjust & Add Subtitle Files in 2016

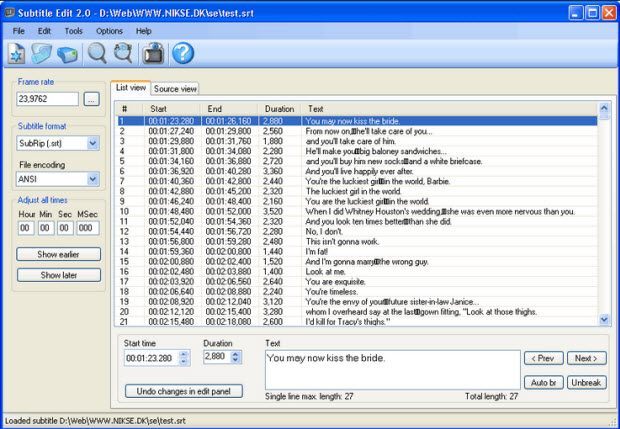
Subtitle Edit

The second tool that we have stands a reputable rating according to various review sites. That is not surprising, for this tool is has one of the nicest users interface which is clear and easy to use. Its intuitive interface can also be customizable according to your preference. Subtitle Edit also works on numerous file formats that are displayed on huge window once it was loaded. Moreover, it also has a spell check feature which is very important in providing a good text retranslation. And if you are looking for a specific subtitle format then you can convert it using this tool. It is a great program to have especially if you are fond of platform customization.

subtitleedit Best free Tools To Edit & Adjust & Add Subtitle Files in 2016

Jubler

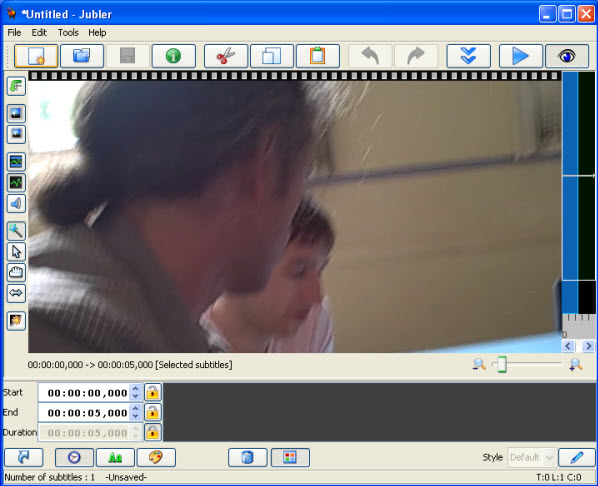
Our next free subtitle editor is none other than the Jubler. This subtitle editor has multiple features that you can make advantage of. Its editing features includes splitting, joining, undo and redo, time shifting, automatic frame rate conversion, and clear areas that is utilized for those who have hearing disability. You must try it yourself and to appreciate the things that this program can do.

jubler Best free Tools To Edit & Adjust & Add Subtitle Files in 2016

Open Subtitle Editor

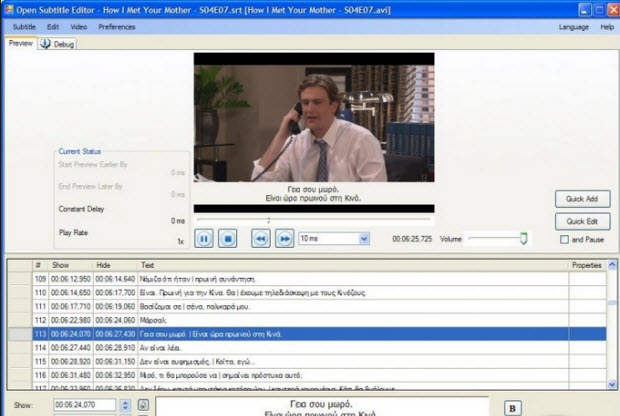
This fourth program is a commonly used subtitle editor for it is easy to use, free of charge, and at the same time reliable. The services that this program provides include basic editing function such as recycling, adding and getting rid of any subtitles. It can also be used for making a subtitle of a video from the scratch. Although this tool is still undergoing development, expert for regular feature updates which are added every time.

opensubtitleeditor Best free Tools To Edit & Adjust & Add Subtitle Files in 2016

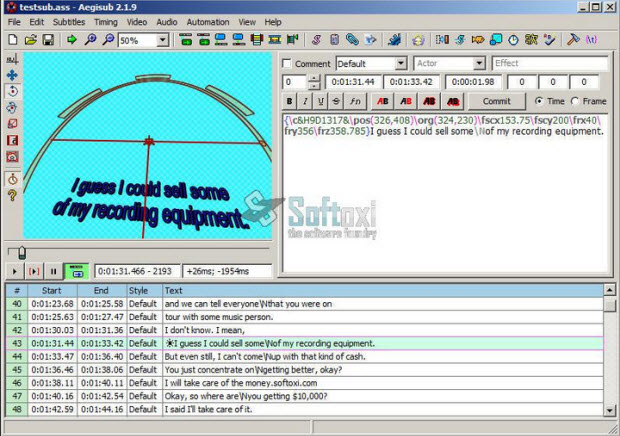
Aegisub

If you are a karaoke lover, then this video subtitle editor is the one for you. This editor enables subtitle insertion according to a specific time or number of frame. It also shows special effects that include animated colors which are excellent for karaoke subtitles. Aside from karaoke, it can also be used in adding subtitles to various movies and TV shows. On the other hand, its interface can cause confusion to green hand users.

Aegisub Best free Tools To Edit & Adjust & Add Subtitle Files in 2016

Desktop Subtitle Editor 

If you find the five free subtitle editor tools mentioned above is confused, you can try these powful desktop subtitle editors as below:

Once you have found and downloaded the subtitles for movies you have, you can add the subtitles to movies with ease, here are some software you can add subtitles:

For Mac users:

For Windows users:

Great News! To thanks for your continued support all along our previous site and the new www.multipelife.com, we are holding a ‘New Site Special’ with fantastic discounts up to 40% off, pay less to get more powerful Pavtube Blu-ray/DVD backup tools!

Like us to get 20% off BDMagic(Blu-ray Ripper), 30% off ByteCopy, 40% off DVDAid(DVD Ripper) and 20% off Video Converter Ultimate on Windows/Mac platform:

https://www.facebook.com/pavtubefans/app_209569249055691

From: http://open-mobile-share.com/pavtube-release-a-new-site/

The following is a simple steps:

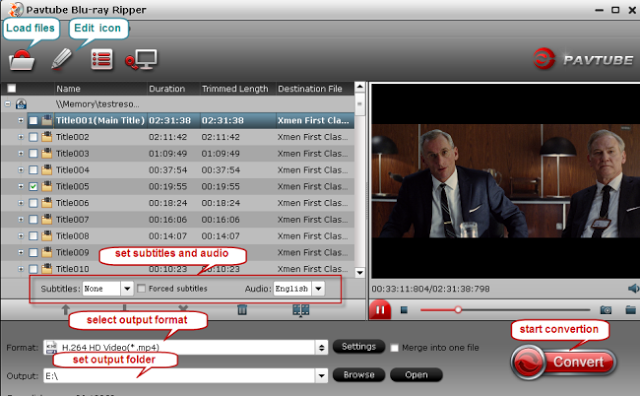
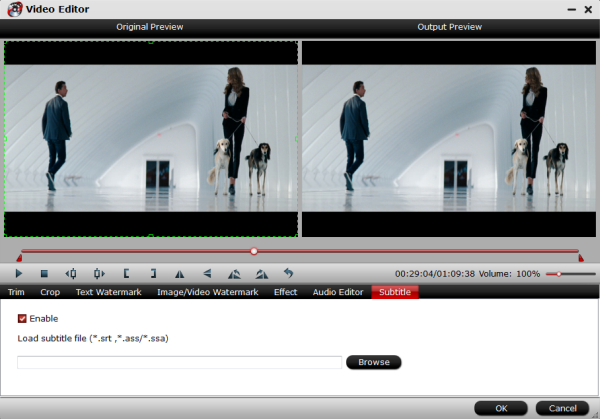
Launch any video tool > Add your movies to the program > click Edit button > check Enable option > load the downloaded srt, ass or ssa subtitle > set an output format > click Convert > click Open button to get the output files.

add subtitle Best free Tools To Edit & Adjust & Add Subtitle Files in 2016

Of course, you can also download the subtitle edit software, make a custom subtitle you need and different style through font, color, size, position, transparency, etc.

Subtitle Download Sites at here: Top 5 Subtitle Download Sites

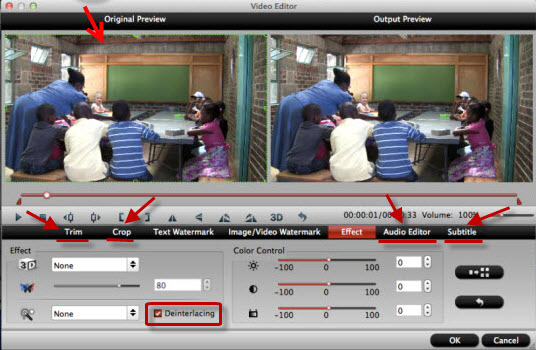
Tip: Moreover, there are other interesting features that can be utilize in these tools, you can also do some simple editor: Trim, Corp, Add Watemark, (3D) Effect, Deinterlacing, Audio Editor.

Details: How to add subtitles to a movie/video?

Try these wonderful tools now, and get the subtitle you need will be written permanently on the output video. Have fun!

Updated on 5th, April, 2016

See also:

share medium Best free Tools To Edit & Adjust & Add Subtitle Files in 2016

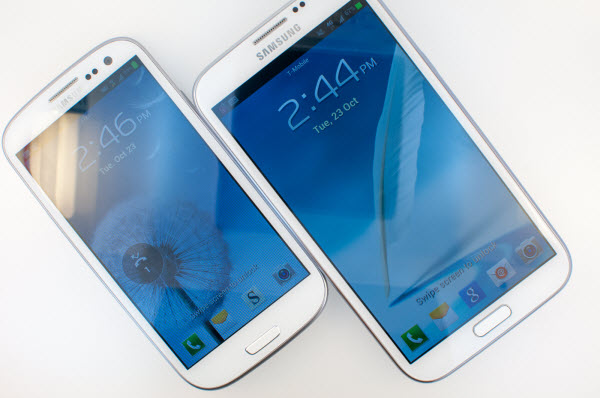
Samsung Galaxy S5 rumors are beginning to pour in, and the latest reports are suggesting some expected features for the device as well as many that are completely new. Here we’re rounding up all of the Samsung Galaxy S5 rumours as they happen, so check back regularly to get the latest information.

With the advent of Samsung galaxy S4, Samsung really shocked the world by the unexpected features of Waving, Tilting, and Eye Tracking. No one could have imagined a phone with an octa core processor before S4 was out. The full HD display with a pixel resolution of 441 ppi is simply incredible. After the launch of S4, experts have already started guessing the features for the upcoming Samsung Galaxy S5. People always have a high expectation from Samsung, and the company always fulfills them. Let’s have a look over the expected features of the beast coming next year.

Samsung Galaxy S5 Galaxy S5: Release Date, Specs, Rumors, and More

Expected Features of Samsung Galaxy S5

  • Metallic Design: No matter how much features S4 packed, it was still criticized for its plastic body design, which resembled its predecessor. Although Samsung managed to maintain the weight with plastic, if we compare it with metallic HTC One, but still there’s iPhone 5 which has a metallic design, and is yet light to hold. We expect Samsung to come up with something premium, yet light at the same time.
  • 3D display: Pixel resolutions have already reached to their topmost levels in previous devices. Even if more pixels are increased, human eye would not be able to perceive them. This simply means that Samsung would need to implement something different this time.
  • Flexible Screen: It’s been quite a time when Samsung introduced its concept displays to the world. The flexible display which seemed just impossible to exist was expected to come with Samsung galaxy S4, but people were let down. Now we hope that Samsung is able to come up with the same technology in its next design.
  • Stereo Speakers: By setting up the two speakers on the front side of new phone, HTC has certainly raised the audio standards existing before. S4 however packed the same tiny speaker on the back. We’re now expecting stereo speakers from Samsung which would give a better listening experience.
  • Bigger Battery: Battery life has always been a critical issue with the smartphones. No matter how much power they pack inside, they are worthless if they go dead when you need the most. We expect S5 to come up with a heavy battery of over 3,100 mAH to help it survive throughout the day even with intensive use.
  • Processor: With the octa core versions already out, we think that the new device might pack 1.3 GHz deca core Exynos 6 Processor, with 3 GB of RAM.
  • Camera: The phone might come up with a 16 MP rear camera, with xenon and led flash. The front camera could be 2.5 MP.

s5 Galaxy S5: Release Date, Specs, Rumors, and More

Samsung Galaxy S5 Release Date

As Samsung announces just one Galaxy premium handset every year, we do not expect anything much from the company till 2014. Galaxy S5 will be launched in the month of April of next year 2014.

Samsung Galaxy S5 Price

Samsung priced S3 at the same range it priced S3 at the launch, and we expect that the trend will continue to be the same even with the new S5. It would be available at the same price as S4 was priced. For more updates stay connected.

There’s undoubtedly going to be a lot more rumours concerning the Samsung Galaxy S5 in the next few months so watch this space for more news as we get it.

Read more Samsung Video Tips: 

Fast Rip Blu-ray to Galaxy S3 Mini or Galaxy Tab 3
Convert Sony Handycam .mts to Galaxy S3/S4 for playback
Playing FLV/F4V videos on Samsung Galaxy Note 3
Convert DVDs to Galaxy Note 3 for leisure use when traveling
Put MKV, AVI, WMV, VOB, TiVo, MPG, M4V, FLV on Galaxy Note 3
Transfer iTunes, Digital Copy, Amazon videos to Galaxy Note 3

share medium Galaxy S5: Release Date, Specs, Rumors, and More

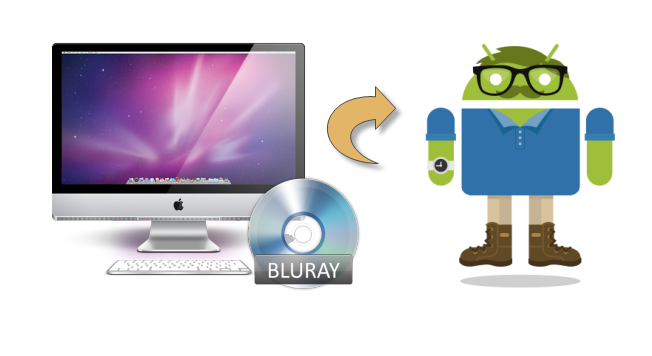
Maybe you’ve got an Android phone or tablet and want to play your favorite Blu-ray movies on it without BD drive anytime and anywhere you like, now get this top Blu-ray Ripper for Mac which enables you transfer Blu-ray movie on Android device on Mac 10.9 Mavericks & Mountain Lion.

watch blu ray on android Easily Convert Blu ray movies to playable format on Android device on Mac

As is known to all that Android now is exceedingly hot among people all over the world. As a strong rival against Apple, Android has clear advantages. Therefore, lots of people would prefer a phone or a tablet with Android system. However, they may be confronted with an obstacle that they cannot watch Blu-ray movies on Android Phone & Tablet directly.Well, no need to worry. Since Android devices don’t have the drive for Blu-ray playback, in order to get Blu-ray movies playable on Android tablets or phones, you need to rip Blu-ray to Android supported video formats like MP4 first before transferring them to your device.

Searched widely and I got some tech support for converting Blu-ray to Android MP4 video on Mac 10.9 Mavericks & Mountain Lion without losing quality in a simplest way, I find more than one people suggest to rip Blu-ray to Android Phone & Tablet on Mac with Blu-ray Ripper for Mac. It is an ideal app for you to rip Blu-ray, DVD, ISO/IFO files to MP4 video. Plus, it also can help you to convert Blu-ray, DVD to almost any other common video format such as VOB, FLV, WMV, AVI, MKV or backup the BD, DVD keeping the whole movie structure as you need. Now are on 30% off for Thanksgiving sale.

With it, you can enjoy 2D/3D Blu-ray/DVD on Android devices like:

Now just download it and follow the tutorial below.

Rip Blu-ray to Android Phone & Tablet for watching on Mac 10.9 Mavericks & Mountain Lion

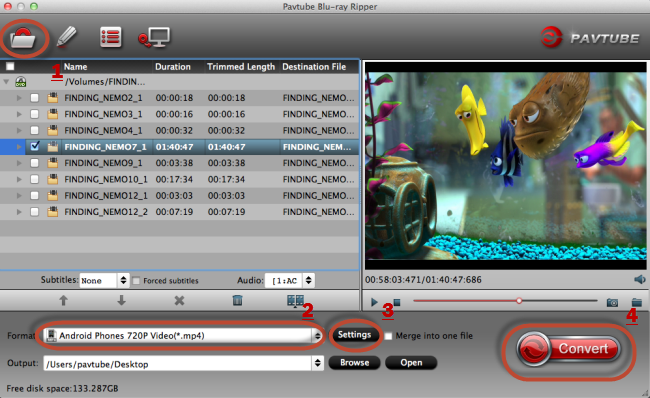
1. Click the top left icon to import Blu-ray/DVD discs correspondingly.

blu ray to android on mac Easily Convert Blu ray movies to playable format on Android device on Mac

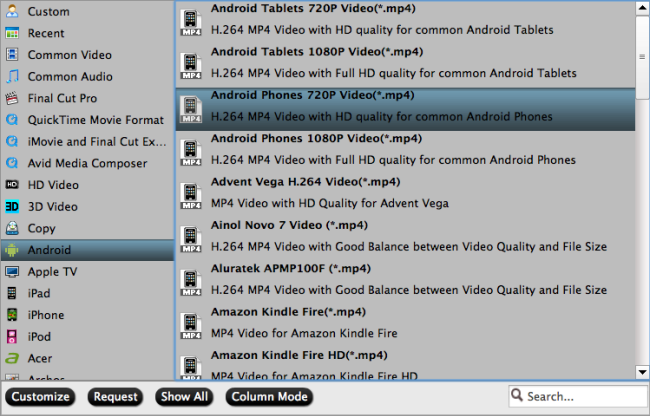
Click the drop-down list on the bottom; choose proper presets according to your device model. You can see columns for normal Android devices, tablets/phones from HTC, Samsung, Motorola or PSP/PS3.

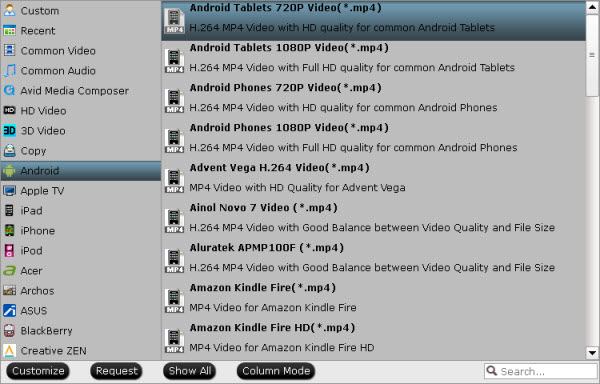
Basically the “Common Video -> H.264 Video (*.mp4)” is a universal format for Android tablets and smartphones. Or depends on your device, you can choose a suitable video format from “Android” catalogue, or you can use the small search box to locate your device quickly.

android video format Easily Convert Blu ray movies to playable format on Android device on Mac

2. Check the pencil-like icon to activate the editing function. Here you can trim video for your needed length, crop video to get rid of annoying black edges, join multiple video clips into one, add text/image watermark and add subtitles. For example, if the original Blu-ray movie has no subtitle or the subtitles you need, you can download it from website and then add it into the output videos for full enjoyment with this software.

Notice the small triangles under the progress bar? Click them to adjust frame by frame easily.

edit videos before conversion Easily Convert Blu ray movies to playable format on Android device on Mac

3. If you want to output video in specific size, bitrate or frame rate, click “Settings” (which is marked as “3″) and change the digits as you need. Pls notes that the video quality improved with the bitrate, but not the higher the better. You need to consider your device configuration as the high bitrate required higher read&write speed.

4. Ok now click the “Convert” button to start converting/copying Blu-ray/DVD to Andorid tablet ot phone for playing. After conversion, click “Open” to locate the converted video directly.

Don’t know how to transfer videos from PC to Android? You can view this Android File Transfer.

How to transfer videos from PC to Android Phone/Tablet?
How to transfer videos from Mac to Android Phone/Tablet?

The Windows version is Pavtube Blu-ray Ripper, it’s also on 30% off to thanks for your great support;

More tips:

share medium Easily Convert Blu ray movies to playable format on Android device on Mac

No matter how smart and high-tech the Apple iPhone is, there is a limitation to its battery life. Here are some useful tips to help you improve your iPhone battery life, including iPhone 5S, iPhone 5C, iPhone 5, iPhone 4S, iPhone 4, iPhone 3GS, especially after updating to IOS 7.

While some of the new features are fabulous, and others are making us crazy, there’s one thing we can all agree on: iOS 7 is not helping our battery life. As Ars Technica discovered, iOS 7 kills battery life faster than iOS 6.1 on every device you can use it on. We’ve got some tips to help you out.

ios7 iphone battery life Tips to Improve IOS 7s iPhone Battery Life

1. Change Your Spotlight Settings

With iOS 7, you can now search for anything on your iPhone using Spotlight. All you have to do is pull down on your Home screen and you can search pretty much every part of your phone, from notes to music, to mail.

spotlight Tips to Improve IOS 7s iPhone Battery Life

It’s convenient, but it also takes a lot of battery power to index all of your stuff. You can change exactly what Spotlight looks in when you use it for search by going to Settings, General then Spotlight search. From there you can choose what you want to index and search.

2. Turn Off AirDrop When Possible

iOS 7 now allows you to quickly and easily share files with your friends’ iPhones. This is only available for iPhone 5 and newer. It’s a great new feature, but it doesn’t need to be on when you’re not using it. To turn it off, go to your control center by pushing up from the bottom of any screen. From there you can disable AirDrop until you want to use it.

3. Turn Your Brightness Down

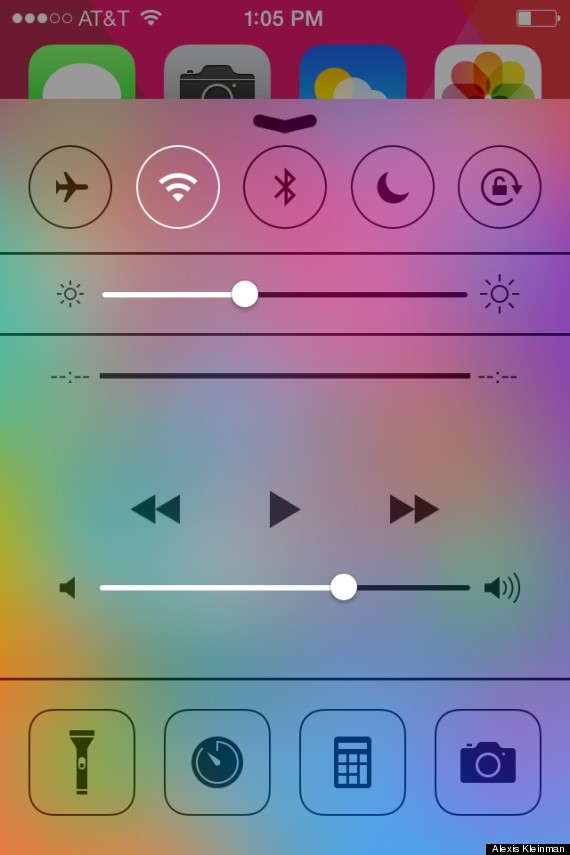
This is a classic way to save battery life, and it’s been made even easier with iOS 7. Instead of going through Settings to get to your brightness, you can change your screen’s brightness from the Control Center. Just pull up from the bottom of any screen.

Brightness Tips to Improve IOS 7s iPhone Battery Life

4. Turn Off Parallax

Remember how people are getting motion sickness from iOS 7? This is one of the reasons why. The aspect of iOS 7 that makes everything look a little bit 3D and makes your background move around behind your apps. It also drains your battery. To turn it off, go to Settings, General, then Accessibility, then Reduce Motion. Turn Reduce Motion on to stop the parallax effect.

5. Turn Off Bluetooth And WiFi

This is another old one, but remember that if you’re moving around and not using your WiFi or Bluetooth, these things are using up your battery. You can keep these features off until you want to use them to save some battery. You can turn these on and off in the Control Center.

6. Disable Auto Downloads

Your iPhone now downloads app updates from the App Store automatically, draining your battery. This feature also automatically downloads purchases from iTunes and the App Store you’ve made on different devices to your iPhone, which you may not want. To stop this and just update your apps and music manually, go to Settings, iTunes & App Store, and scroll to Automatic Downloads. There you can turn Automatic Downloads off for music, apps and books.

7. Turn Off Frequent Locations

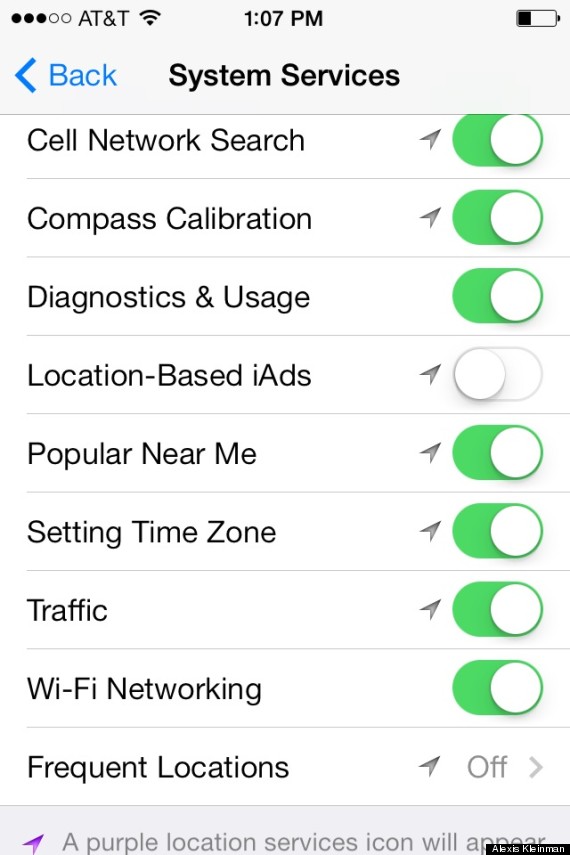
Your iPhone wants to learn the places you often visit to give you “provide useful location-related information.” This is takes up a lot of battery life and may also make you feel uncomfortable privacy-wise. To disable it go to Settings, Privacy, then Location Services. There, scroll all the way to the bottom and hit System Services. There you can also turn off Location Based iAds (ads from Apple based on your frequent locations). Then go to Frequent Locations and turn that off, too.

location settings Tips to Improve IOS 7s iPhone Battery Life


8. Say Goodbye To Siri

Unless you’re using Siri regularly, you’re better off disabling her to save battery. To do so, go to Settings, General then Siri. Tap Siri and you can turn her off. Sorry, girl!

9. Don’t Use A Moving Background

The new moving backgrounds that iOS 7 offers are super cool, but they will totally kill your battery. To change your iPhone’s wallpaper, just go to Settings, then Wallpapers & Brightness. Try out one of the beautiful new static wallpapers or use a photo of your own.

share medium Tips to Improve IOS 7s iPhone Battery Life

iPhone is one of the most frequently things to be stolen. In this article, we will give your 10 Useful Apps for you to learn how to locate your iOS device and protect your data if your device is lost or stolen.

This is a true story “my girl friend went shopping and found her iPhone 5, which is the birthday present I gave her, had been stolen! When I asked her if she had turned off Find My iPhone function, she even didn’t know there is such thing in iPhone. I comforted her that I could buy a new one for here, but she insisted that we should find stolen iPhone because I had just helped one of my friends found his stolen iPhone successfully few weeks ago.

track stolen iPhone Apps for you to Track or Find Your Stolen iPhone

For starters, you will lose all your precious data: music, photos, apps and contacts. Getting a new phone would mean you have to start recollecting all these items from scratch. If hearing that gives you a headache, let me remind you that the person who has located your iPhone will also have access to all your online accounts: social networking sites like Facebook and Twitter, personal emails — and if you are one of the many people who do their banking online, better change those passwords quick. In any case, identity theft has been made easier these days since your smartphone now carries your online identity.

While it is almost impossible to prevent you from dropping or misplacing your iPhone, it is possible to reduce the effects (and pain) of losing your iPhone and the contents within forever. Here are 10 useful apps (3 of them with step-by-step guides on how to use them) which can help you turn the tables in the event of your iPhone going MIA.

Here is recommended Reading: Top 10 Security Tools For Your Smartphone


 1. Find My IPhone

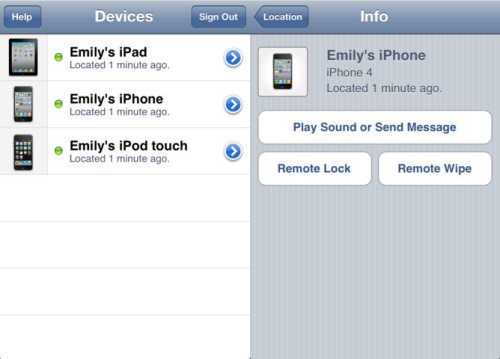
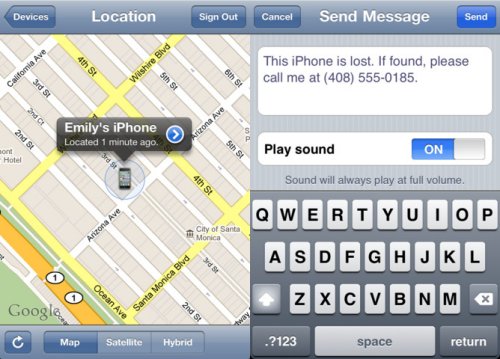
Apple does not provide a product for tracking stolen iPhone, but Apple provides the Find My iPhone feature for iPhone. Find My iPhoneapp allows you to use another iOS device to locate your missing iPhone on a map, protect your private data, display a message, play a sound at full volume (for few minutes) even if your missing iPhone was set to silent, and remotely lock your device. [Free]

To Use Find My iPhone Before iPhone is Lost or Stolen

find my iphone Apps for you to Track or Find Your Stolen iPhone

Locate Missing iPhone with Find My iPhone:

As long as your Find My iPhone is turned on on the lost/stolen iPhone ANDit’s connected to the Internet, you will be able to find your iPhone’s current location.

  • Visit http://iCloud.com/find.
  • Sign in your iCloud account using Apple ID.
  • Click on the Find My iPhone button.
  • Choose Locate an iPhone device if you have set up more than one iOS device.
  • Your lost/stolen iPhone’s location will show on the map if your device is online.
  • If your iPhone is offline, you can set an option to receive an email whenever your iPhone is connected to the Internet.

find my iphone 2 Apps for you to Track or Find Your Stolen iPhone


2. GadgetTrak

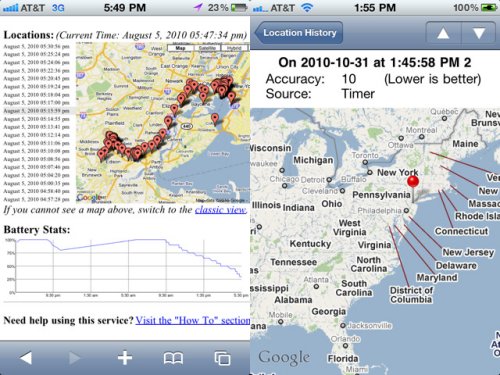
GadgetTrak app increases your chances of recovering your lost or stolen iPhone by generating location reports, sending a discreet message to your device, and snapping a photo of the thief with the built-in camera. With its restriction on “Deleting Apps”, the thief will not be able to delete GadgetTrak from your iPhone. [$3.99]

Install GadgetTrak Before the iPhone is Lost or Stolen

  • Purchase and install GadgetTrak.
  • Tap the GadgetTrak application icon on your iPhone to launch the app.
  • Create an account and sign in.
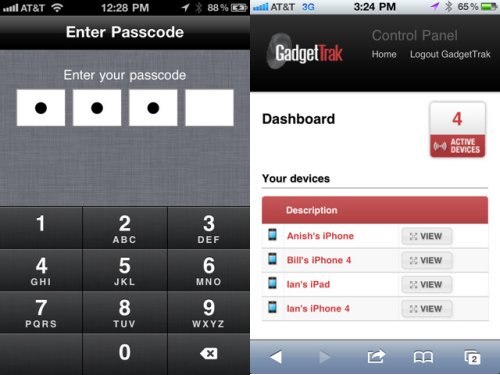
  • Set a passcode for GadgetTrak to prevent others from changing your settings or seeing the tracking status.

gadgetrak Apps for you to Track or Find Your Stolen iPhone

Recovering Lost/Stolen iPhone with GadgetTrak

  • Visit http://trak.me to enable tracking.
  • Select your device to log in.
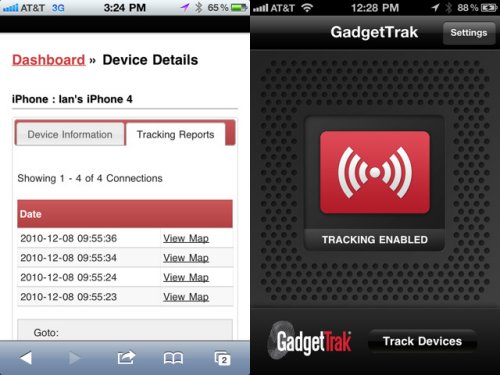
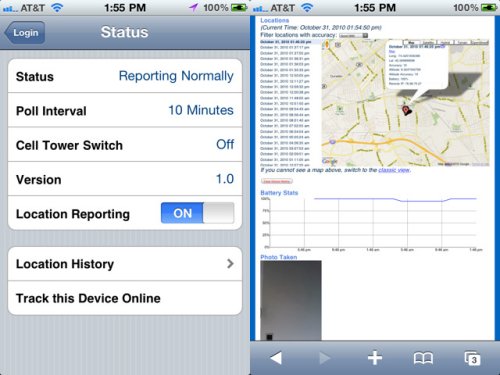
  • Once logged in, you’ll see your iPhone plotted on the map.
  • Click the “View” button then select “Tracking Reports” on the top.
  • The Camera allows you to snap a photo with a one-time fee of $0.99.

gadgetrak 2 Apps for you to Track or Find Your Stolen iPhone


3. Device Locator

Device Locator allows you to track the location of your misplaced iPhone, sound an alarm on your lost or stolen iPhone, take a photo of the user remotely and send a message with sound. There’s no monthly or yearly fees involved. [$3.99]

Use Device Locator Before the iPhone is Lost or Stolen

device locator Apps for you to Track or Find Your Stolen iPhone

LoJack Your Stolen or Lost iPhone with Device Locator

  • Visit https://device-locator.com and login to your account.
  • Set it to emergency mode and lock the application from the web application.
  • Track your iPhone’s recent location history, including the most recent position on a map.

device locator 2 Apps for you to Track or Find Your Stolen iPhone

4. IHound


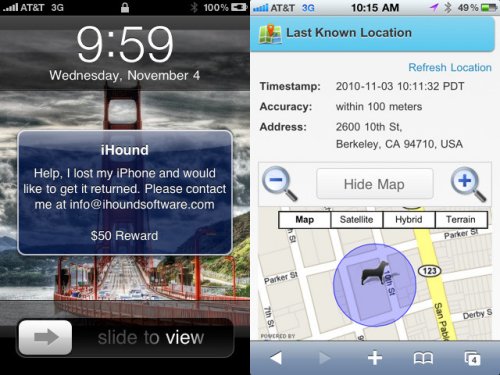
iHound helps locate and keep your iPhone safe with remote locking, remote data erasing, location tracking and siren alerts playing. It’s a free download but users are required to subscribe at least 3 months which costs $3.99. [$3.99/3 Months]

ihound Apps for you to Track or Find Your Stolen iPhone

5. If Found+

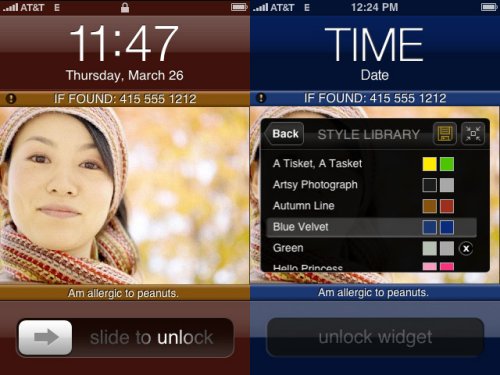
If Found+ replaces your iPhone background wallpaper with a message if you have lost your iPhone. Even if your iPhone is locked with a passcode, a good Samaritan can reach you if he/she finds your phone. [$0.99]

if found+ Apps for you to Track or Find Your Stolen iPhone

6. Mobile Spy

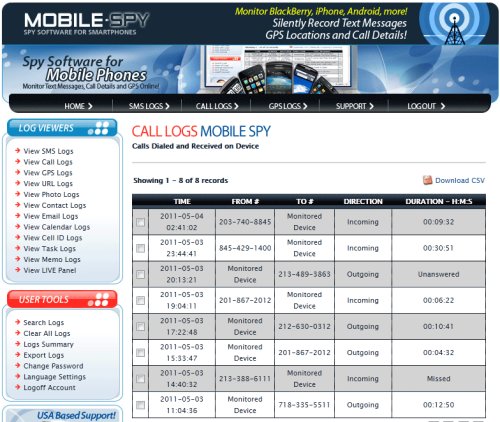
Mobile Spy allows you to monitor your iPhone in real time by providing reports of incoming and outgoing calls, SMS, GPS locations, contact list, e-mails, website URLs, photos and videos. [$99.97/year]

mobile spy Apps for you to Track or Find Your Stolen iPhone

7. Phone Trace 4
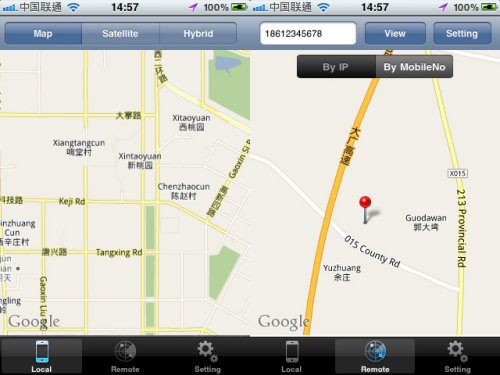
Phone Trace 4 tracks your lost or stolen iPhone’s real-time location reports and provides you with the new number of the person who is holding on to your iPhone. It also can send emails, SMS and some commands remotely. [$7.99]

phone trace 4 Apps for you to Track or Find Your Stolen iPhone

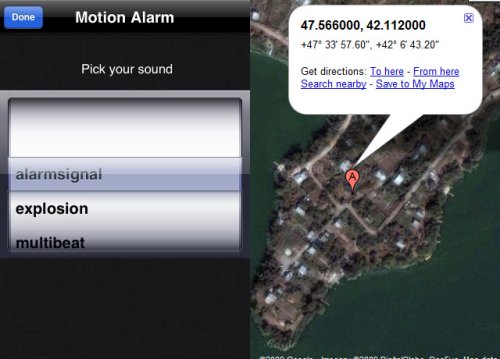
8. Motion Alarm

Motion Alarm plays a customized alarm to alert you or the unauthorized iPhone holder when a preset level of movement is reached. It also provides GPS tracking so you’ll be able to receive a position report in your email Inbox. [$1.99]

motion alarm Apps for you to Track or Find Your Stolen iPhone


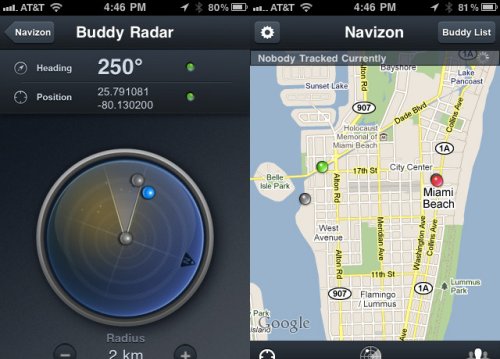
9. Navizon

Navizon marks the positions of your lost/stolen iPhone with a real-time and accurate live locating system. [Free]

navizon Apps for you to Track or Find Your Stolen iPhone


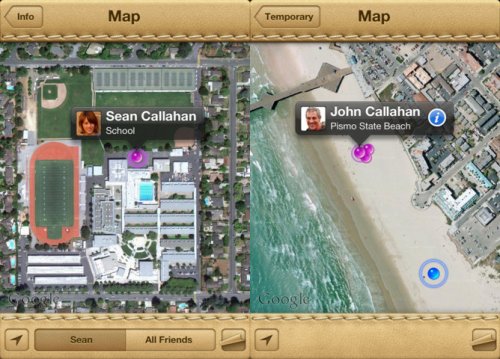
10. Find My Friends

Besides Find My iPhone, the Find My Friends app can be used as an iPhone device tracker as well. By using your family members’ or friends’ iPhone (which has been accepted and added previously), you’ll be able to see your iPhone’s location on a list or on a map. [Free]

find my friends Apps for you to Track or Find Your Stolen iPhone

What else could we do…

>> If you failed to track your stolen iPhone with tracking app, you also can get the help from police. Report the information of stolen iPhone to the police, the police would help you find it if they got the relational information.

>> What the thief would do after they stolen your iPhone? Maybe they would keep it himself or change hands, or even sneak your iPhone data to do wrong. In order to keep your data safe, click the Lost Mode button and enter the iPhone unlock password in Find My iPhone.

>> Although you keep your data safe, but you lost some important data, such as contacts, photos, text message etc.

Learn how to Recover data from iTunes backups for an iOS device

share medium Apps for you to Track or Find Your Stolen iPhone

Looking for an easy to way to rip DVD movies on Windows 10/8.1/8/7? Get the best DVD ripper for Windows, so that you can view movies everywhere and everytime with original quality.

Have many DVD Discs, but afraid of damaging them all the time. Or you have rented several DVD movies, only to find that you do not have time to watch them at all? In cases like the two, the basic solution is backing up or rip DVD movie to hard drive on Windows 10/8.1/8/7. Do not know how to convert the giant DVD movie to hard drive? Do not worry, that’s where this article originated from.

dvd to windows 8.1 8 7 Convert DVD movies on Windows 10/8.1/8/7 for watching freely

Last week I tweeted about having successfully ripped my first DVD disc on the my Windows PC, and while the process wasn’t actually all THAT difficult, quite a few of you inquired about how I did it, and what my hardware/software setup was, so I figured I would throw this quick tutorial up.

The software you’ll need is Pavtube DVDAid (Read review) for Windows 10/8.1/8/7,  this is top DVD Ripper which can rip latest DVD discs/floder/ISO/IFO image files to any formats you need, such as MP4, MOV, AVI, WMV, FLV, MPG, etc. with super fast speed. And when you converted DVD to compatible formats, you can transfer DVD movies to hard drive for freely watching on your Android/Apple/Windows 8 tablet or smartphone, or other playable devices.

Note: If you are Mac users, view Pavtube DVDAid for Mac; well support Mac OS X 10.9 Mavericks!

If you have any requirements of keeping multiple audio tracks/subtitles, you are suggested to try this Blu-ray/DVD Converter Pro.

To begin our journey, download and install the app here.

There are three icon on the top which let you load from disc, folder and ISO/IFO respectively.

dvd to mp4 Convert DVD movies on Windows 10/8.1/8/7 for watching freely

Now we got the disc loaded into DVD to Android/iOS/Windows 8 Ripper and it’s ready to go.

Choose your Output directory down which is marked as step 2.

What’s more, here’s where DVD Ripper truly makes its mark and sticks out from the muddled mess of conversion software and magically manage dvd  movies on Windows 10/8.1/8/7 flexibility and options.

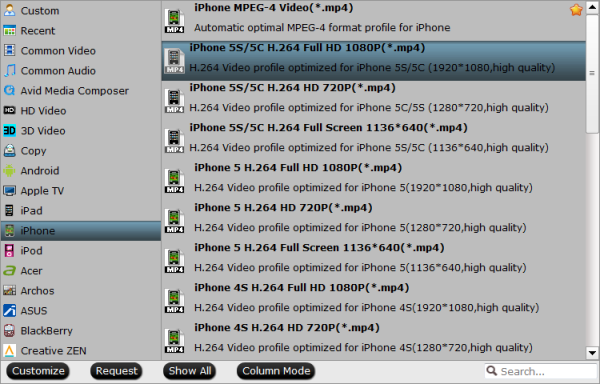
Click “Settings” which is marked as Step 3, you will find presets to which suits iPad, iPhone and iPod.

For ripping DVD to iPad series (iPad Air, iPad 3 or iPad 4, the iPad Mini,  iPad Mini 2), options from “iPad” meets your demand;

For ripping DVD to iPhone 6/iPhone 6 Plus, the iPhone preset is able to work well.

iphone 5s 5c video format1 Convert DVD movies on Windows 10/8.1/8/7 for watching freely

For those who in demands of ripping DVD to Android devices, you can always find the one you want in Android preset.

android video format Convert DVD movies on Windows 10/8.1/8/7 for watching freely

(Plenty of presets that can be customized as necessary.)

Now just press the big circular “Start Conversion” button to the right and let it do its magic. You will not need to keep an eye on it as it can help you to shut down computer automatically.

So there you have it. Pretty simple. Go ahead and rip DVD to Android/iOS/Windows devices and enjoy…as you should have been able anyway. No loss in quality, audio is fantastic, ease of use as well as quite quick, it’s really worthy to give a shot.

  •  Users review:

I love this ripper/converter! This is the 4th program I’ve tried and this one blows the competition away. I find it very easy to use and I’m not at all good with computers : Ease of use and Best Choice from several reviews (did try the free version first), also like that you have the choice of a lot of different formats.

This program could handle a great number of DVD sources and conversion possibilities for a good price-performance ratio. I really like it for the straight-forward, clean interface. Let alone the plenty of presets that can be customized as necessary.

Did a lot of research before zeroing in on Pavtube. This is an all in one package. There are other rippers but some were slow, some ripped only non-protected media, some ripped in specific formats, but after giving pavtube a try, it had all the qualities I needed. Speed, conversion formats from various media and also from protected media.

Read more:

share medium Convert DVD movies on Windows 10/8.1/8/7 for watching freely

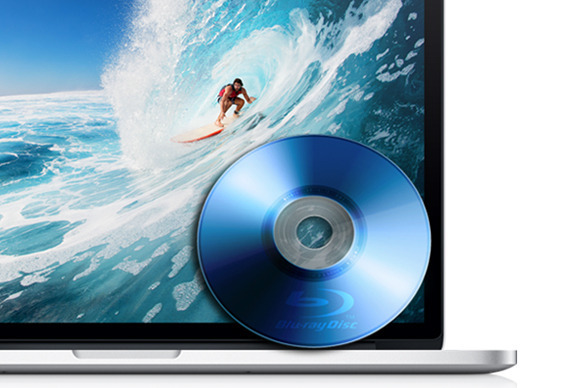
Lots of people want to watch Blu-ray movies on their Macs. Until now, though, doing so required ripping the movies to your hard drive and playing them that way or use some Blu-ray Player for Blu-ray movies enjoying.

One of Steve Jobs’s most memorable comments may be the way he referred to Blu-ray as “a bag of hurt” back in 2008 during a Q&A with members of the press:

“I don’t mean from a consumer point of view—it’s great to watch movies—but the licensing is so complex. We’re waiting until things settle down and Blu-ray takes off in the marketplace before we burden our customers with the cost of the licensing and the cost of the drives.”
bluraymac How do I play a Blu ray Disc on my Mac

As Macs users well know, things haven’t settled down (at least not from Apple’s perspective). Four and a half years after that comment, OS X still doesn’t support Blu-ray playback, nor has any Mac shipped with a drive capable of even reading or burning data on a Blu-ray disc. And given that few Macs even include optical drives these days, Apple’s never going to bring Blu-ray to the Mac. (The company can already sell you HD movies and TV shows directly from the iTunes Store, so why would Apple want to embrace Blu-ray?)

While Blu-ray was in its early days when Jobs made his “bag of hurt” comment, the format has come a long way, and the Blu-ray disc is holding its own in the marketplace. True, people still buy more DVDs than Blu-ray discs, but that could change in the next few years.

And even though downloading HD movies is easy, there are several reasons to buy Blu-ray discs. The picture quality is better (with higher bit rates and less compression), as is the audio (with several different mixes for multichannel systems). If you lack a fast Internet connection (or are subject to bandwidth caps from your ISP), it may be quicker and easier to buy a Blu-ray disc than wait to download a file that might top out at 8GB. Also, even with digital extras included with many movies now, you don’t get the full complement of bonus content you do with a disc. Finally, an optical disc is a good, hard-copy backup.

Sold on Blu-ray yet? Then it’s time to learn how you can watch and even rip Blu-ray discs on a Mac.The hardware portion of the equation.

The first step to be able to play Blu-rays on a Mac is to purchase a Blu-ray drive. You can get an external, USB Blu-ray drive for less than $50, though you might want to look around the $80 to $100 range to find a good one. (The cheaper models are usually from unknown vendors and often get poor reviews from users.) Many of these models are bus-powered, so you don’t need a power supply; just connect them to a Mac that has powered USB ports, and you’re up and running. You won’t need any special drivers to mount the Blu-ray discs, but once they’re mounted, there’s not much you can do with them.
mce br How do I play a Blu ray Disc on my Mac

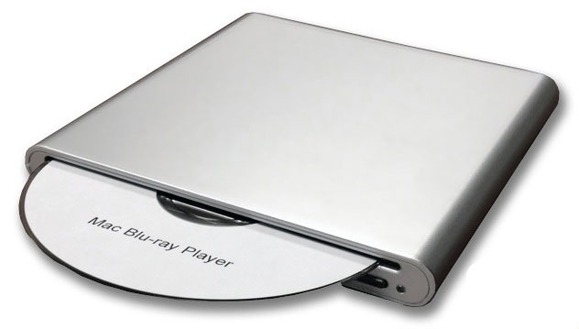
MCE Technologies’ $79 USB Super-BluDrive includes Blu-ray playback software for your Mac.

MCE Technologies sells a USB Super-BluDrive for $79, which includes software that can play Blu-ray movies (the same program I’m going to look at below, Mac Blu-ray Player). OWC also offers both internal and external Blu-ray drives, but you’ll need to bring your own software to the party.

Bear in mind that a Blu-ray drive can also play DVDs and CDs. So if you’re planning to get an external drive to connect to a Mac that is devoid of such a device, think about getting one that includes Blu-ray support.

Blu-ray playback software

At first blush, there are a number of different Blu-ray playback software options for Mac users. But if you take a closer look, you’ll discover that they are often the same software but with different monikers, sold by companies with different names.

  • 1. Pavtube Blu-ray Ripper for Mac. It is the program I’m using. I purchased it because it can rip any blu-ray disc to many video formats. This software is very affordable, and worth each dollar. I use this software to rip my blu-ray collection to mkv and mp4 format so that I can watch the movies many times without having to insert a blu-ray disc in my computer each time. I have not had any problems with this software, it is very stable.blu ray ripper How do I play a Blu ray Disc on my Mac

The program is easy to use for editing and conversion and makes great quality copies of my Blu-rays and DVDs. It can help you rip Blu-ray discs to any popular video formats such as MP4, AVI, FLV, WMV, 3GP as well as any popular audio formats such as AAC, AC3, MP3, OGG and WAV. Designed for fast speed and negligible video quality loss, this amazing software is your best choice for Blu-ray ripping  on Mac. It also enables you to copy Blu-ray disc contents without any quality loss by removing Blu-ray copy protections. It has added 3D profiles in Format menu. (Side-by-Side, Top-Bottom, or Anaglyph 3D in MKV/MP4/MOV/WMV/AVI). In colusion, it is an all-in-One Blu ray tools: Blu-ray Ripper, DVD Ripper and 3D Blu-ray Ripper on Mac.

  • 2. DVD Fab Blu-ray Ripper for MacI tried the trial version of DvdFab Blu-ray ripper, but I did not buy it as Pavtube Blu-ray ripper can do the same things and it more affordable. Theonly feature I would like pavtube to add, is an option to rip blu-ray discs to mkv with DTS audio. I love the option to crop the blu-ray videos, so you can remove the black borders that are on many blu-ray movies. I highly recommend Pavtube blu-ray ripper, and want to give this software 5 stars rating. Pavtube are very good at what they do.
  • 3. Most of you are likely familiar with the excellent Handbrake for ripping standard Def DVDs (HandBrake does not rip or decrypt commercial DVDs), but while the latest version of the software has added SOME support for reading Blu-Ray folder structures, it cannot yet decrypt the Blu-Ray discs the way it can with regular DVDs, so you’ll need to add an intermediate step.
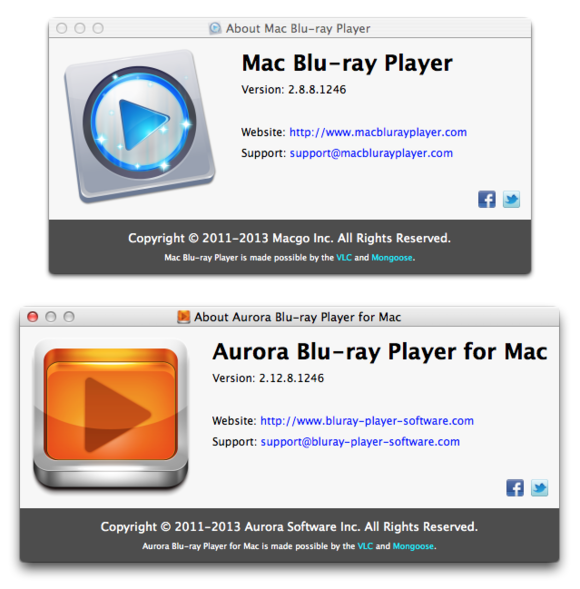
  • 4. Aurora Software’s Blu-ray Player ($30 for a one-year license or $40 for lifetime usage) and Macgo’s Mac Blu-ray Player ($60 for a lifetime license, but discounted to $30 until July 1).about blu ray How do I play a Blu ray Disc on my Mac

These two About boxes look surprisingly similar. That’s not the only way these two programs are alike. In my testing, I found the interfaces to be exactly the same, aside from some different colors. The Preferences windows are the same; the About boxes are nearly the same, too, with just a slight difference in version numbers. This kind of similarity is common with DVD, Blu-ray, and other types of video-conversion software. For simplicity, I’ll focus on Mac Blu-ray Player. (Note that Mac Blu-ray Player is due for a 3.0 update soon; I tested version 2.8.)

First, you should be aware of a couple of things. Because the software needs to acquire the decryption keys required for playback online, you need an Internet connection for it to work. Second, registering the software imposes constraints. When I registered Mac Blu-ray Player on my laptop, I couldn’t use it on my desktop Mac. And, when I switched the registration back to my desktop Mac, the software told me I had activated it two out of five times. As the company’s website explains it:

There are five times each year for Macgo registration code activation. If registration code activation is outnumbered, it will present a tip “Registration failed. Your registration code activation limit is reached.”

  • 5. Mac Blu-Ray PlayerExecutive Editor Jonathan Seff looked at Mac Blu-Ray Player about two years ago, and found it quirky and unreliable. Since then, the company has definitely improved the software. When you insert a Blu-ray disc in a drive and launch the software, it detects the disc and displays a spartan “menu.”

menu How do I play a Blu ray Disc on my Mac

Mac Blu-ray Player can’t reproduce the menus on a Blu-ray disc; instead, it presents this limited display. Sometimes, there is no cover art, just a generic Blu-ray logo.

In watching half a dozen Blu-ray movies with the software (all recent releases, ranging from Sucker Punch to a just-released disc of Bach’s “St Matthew’s Passion”), I encountered none of those early problems with playback or stability. Video playback was smooth, with no artifacts, in both a window and in full-screen mode. Audio was similarly fine, although the app crashed once when I turned on subtitles for a movie that wasn’t in English. I tested the app on both a late 2011 Mac mini (2.7GHz Intel Core i7 with 16GB of RAM) and an early 2013 MacBook Pro (2.5GHz Intel Core i5 with 8GB of RAM), using my Plextor PX-B120U 4X Blu-ray drive (discontinued but still available for around $100 online).

The software offers the standard play/pause controls, but also lets you skip forward or back in 30-second chunks; change audio track and subtitle synchronization; adjust brightness, saturation, contrast, gamma, and hue; and much more. I found nothing lacking in the software’s functionality.

Ripping Blu-rays

In addition to simply playing your Blu-ray movies on your Mac, you may want to copy them to your Mac to watch on your laptop when traveling, or convert to a format you can watch via an Apple TV, for example.

[Editor’s note: The MPAA and most media companies argue that you can’t legally copy or convert commercial DVDs or Blu-rays for any reason. We (and others) think that, if you own a disc, you should be able to override its copy protection to make a backup copy or to convert its content for viewing on other devices. Currently, the law isn’t entirely clear one way or the other. So our advice is: If you don’t own it, don’t do it. If you do own it, think before you rip.]

There are two methods you can use. The first involves decrypting and copying the entire disc to an .iso disc image. This file will be the same size as the original Blu-ray—about 30GB to 40GB—so you may run into space issues pretty quickly. I used Pavtube Blu-ray Ripper for Mac Software’s free Blu-ray Copy, and this app copied my Blu-ray discs in roughly real time; a 2-hour movie took about two hours to copy. You can then play the copy by mounting the disc image, and using Mac Blu-ray Player. In that app, choose File > Open File, or click Open File in the main window, and select the BDMV file in the disc image. You can also open BDMV files with the free VLC Media Player.
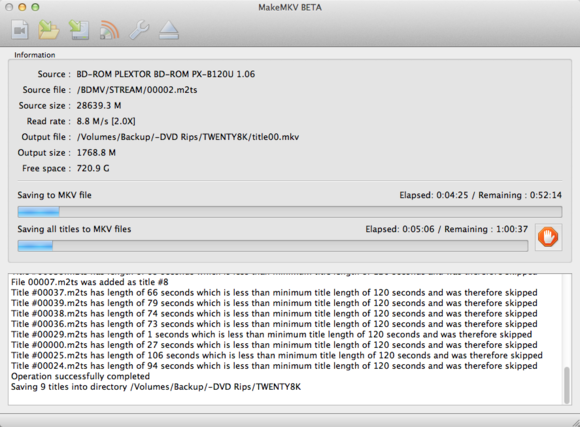
makemkv How do I play a Blu ray Disc on my Mac

MakeMKV can rip Blu-ray discs and create MKV files, that you can play back on your Mac.

The second method is to make an MKV file (MKV is a file container format that can hold video, audio, picture, and subtitle tracks in a single file). Using GuinpinSoft’s MakeMKV—free while in beta, which it has been for several years (visit this forum thread to find the current temporary beta key)—you can decrypt a Blu-ray disc and save whatever parts you want (if you don’t need the 7.1-channel audio mix, for example, just uncheck it) into an MKV container. This takes about half the duration of the movie; when the decryption is finished, you have an MKV file that you can play back with VLC or other software. If you want more manageable file sizes, you’ll need to convert the MKV to a smaller file—in the same format, or in a different format, such as an iTunes-compatible MP4—using a tool such as HandBrake.Into the blu

That’s pretty much all there is to it. You may encounter certain discs that don’t work due to new and varying copy protection, but in general the process is pretty easy if you’re willing to invest a little time and money. Among all, I like Pavtube of course, the software works like most other Blu-ray Rippers I’ve used and the process is straightforward. Pop in your disc (Note: A BD drive is needed for ripping Blu-rays), choose the optimized output for your device, and start the conversion on Mac now!

Read more:

2013 Top 5 Blu-ray Ripper Review
How to enable Surface 2/Windows 8.1
Rip Blu-rays to MP4 for Kindle Fire HDX 7/8.9
share medium How do I play a Blu ray Disc on my Mac

If you are on the hunt for some Kindle Fire HDX tips and tricks then check out supply. We have some short guides and advice on getting more from your Amazon tablet.

Amazon’s Kindle Fire HDX comes in two flavors. The 7-inch version isA duking it out with Google’s Nexus 7 and Apple’s iPad Mini, while the 8.9-inch version takes on the iPad Air and the Nexus 10. No matter which model you have, we’ve got some suggestions and short guides to help you get the most out of your hardware. Take your pick of the Kindle Fire HDX tips and tricks on offer. These tips apply to the Kindle Fire HD as well, unless otherwise stated.

amazon kindle fire hdx Helpful Tips and Tricks for Kindle Fire HDX

Before we get started, here’s how to take a screenshot on the Kindle Fire HD. You may also want to check out our Kindle Fire HDX problems and solutions.

Updated on 10-28-2013[b] by Simon Hill:[/b] Made a lot of updates to the article to address the newly launched Kindle Fire HDX tablets, added how to use Mayday feature and how to add ebooks as well.How to use Mayday on the Kindle Fire HDX

kindle fire mayday Helpful Tips and Tricks for Kindle Fire HDXOne major difference between the HDX tablets and everything else on the market speaks to Amazon’s commitment to customer service. Your first port of call for any Kindle Fire HDX issue is going to be the built-in Mayday feature. It will connect you to an Amazon representative who can potentially access your tablet and fix any problems that you have encountered. Just swipe down from the top of the screen and tap the Mayday icon at the top right (it looks like a life preserver and it’s clearly labeled). You should see a pop-up window with an Amazon advisor inside it within a few seconds. You’ll be able to see them, but don’t worry, they can’t see you. They’ll also have to ask permission before they can access anything potentially personal on your tablet.How to add ebooks

The Kindle Fire HD and HDX support various ebook formats. The proprietary Amazon Kindle AZW format is best, but KF8, TXT, PDF, or unprotected MOBI files will all work as well. If you want to add ebooks to your Kindle Fire HDX from outside of Amazon, then just download them in a supported format, and put them in your Books folder, and they’ll appear under your Books tab. You can use a free app like ES File Explorer to move files around on your tablet.

If you have a collection of ebooks on your computer, or you can only find an ebook you want in an unsupported format, then you should grab the free Calibre software. It can be used to convert your ebooks into the AZW or MOBI format.How to get rid of ads

The temptation of that rock bottom price tag may have persuaded you to opt for the “With Special Offers” version of the Kindle Fire HDX. That’s simply Amazon’s way of describing advertisements and if you find yourself getting sick of them quickly, you are not alone.

You can get rid of the “special offers” by shelling out $15. Go to Amazon, sign into your account, and go to Manage Your Devices. Under Special Offers click Edit, click next to Subscribed, click next to the device, and then review the price and click Unsubscribe.

You can also turn off recommendations by going to Settings > Applications > Amazon Home Recommendations and set to Hide.How to install apps from outside Amazon’s Appstore

One turn off with the Kindle Fire HDX is the fact that you don’t have Google Play access on your device and are limited to the choice of apps and games in the Amazon Appstore. There are over 700,000 apps out there for Android, but only a small proportion of them are in the Amazon Appstore and it doesn’t include Google’s apps. You could root your device, but you’ll void the warranty and there is a better way. Before you enable installation of apps from other sources, you should consider installing a good Android security app.

Pull down the notifications bar and hit More to access Settings > Device and then set Allow Installation of Applications From unknown sources to On. You can now sideload APK files onto the device. You can download them to your desktop and copy them over or send them by email, or you can just go direct to websites that stock APK files on your Kindle Fire HDX. Check out our list of alternative Android app stores for some places to start.

If you have an Android phone or another device with access to Google Play, you can download the apps and games you want to that device, and then back them up and copy them over to your PC using a file explorer app. You can then Allow Installation of Applications on your Kindle Fire HDX and install something like the free ES File Explorer app. Copy them over to your Kindle Fire HDX from the PC and then use the file explorer to find them and install them. You can also use DropBox to easily share APK files wirelessly.How to lock screen rotation

kindle fire hdx front videos Helpful Tips and Tricks for Kindle Fire HDXYour Kindle Fire HDX screen should rotate automatically when you turn the device and flick between portrait and landscape. Some apps have a locked orientation in one mode or the other. You can also lock the orientation yourself. Pull down the notifications bar and tap the Locked orUnlocked option at the top left of the Quick Settings.How to enable security and parental controls

You can enable basic security for your device by setting up a lock screen password. Simply pull down the notifications bar and hit More > Security and turn Lock Screen Password to On, then pick the password you want and hit Finish. You can also set up more security to block access to specific content, restrict purchases, set up different profiles, or even set time controls by using the parental controls. They give you a fine degree of control over the device.

Basic Parental Controls can be found in the same Settings menu via More in Quick Settings when you pull down the notifications bar, but this will set controls for the device whoever is using it.

If you want more fine control and multiple user accounts, go into your apps and fire up Kindle FreeTime. You’ll find a host of options to carefully control your child’s access to content on the device, but you could also use it to set up a guest profile and keep some of the Kindle Fire HDX off limits for other people.How to watch Kindle Fire HD content on your HDTV

One advantage the Kindle Fire HD has over the Nexus 7 is the ability to plug it into your HDTV with the right cable. You can then watch some content on your big TV. Be warned, though, that some services like Hulu Plus or HBO Go will not allow you to output content from the Kindle Fire HD to a TV.

Buy a Micro HDMI to HDMI cable like this one, which is only $9 and plug it in.

The Kindle Fire HDX doesn’t support an HDMI cable connection like this, but there is a feature called Second Screen coming in November, which will allow you to share content via Wi-Fi. Your Kindle Fire HDX will serve as a second screen for additional information and as a remote control, while the content plays on your compatible Samsung TV or PlayStation 3. Support for thePlayStation 4 is reportedly in the works, but that’s it for now. We’ll update you with full details on how to use it when this feature goes live.How to install Flash

If you want to be able watch Flash videos, you’ll need to jump through a few hoops. The native Silk browser does not support Flash, so you’ll need a new browser as well.

Go to More via the notifications bar and tap Device. Then turn Installation of Applications From unknown sources to On. Now you’ll need a file explorer app, ES File Explorer is free. Find Dolphin HD and Flash Player APK files online. Now load the APK files onto your Kindle Fire HDX, use the file explorer to find them and tap to install starting with Dolphin and then Flash Player.How to get more storage

If the 16GB or 32GB of built in storage isn’t enough then you can expand your space with cloud services or even hardware. You can get 5GB for free with Amazon Cloud Drive. Music you have bought through Amazon should be available via the Amazon Cloud Player, but you can use the Amazon Music Importer found here to upload some of your own music (250 songs for free).

You could also try another cloud service like DropBox, SugarSync, or Box. You could even consider buying an external hard drive like the Kingston Wi-Drive which also has a companion Android app to install on your Kindle Fire HD.How to access the camera on Kindle Fire HD

You’ll notice that the front-facing camera is available if you start up Skype or some other apps like Evernote and Facebook, but is also possible to use it without them. If you have installed the free ES File Explorer app discussed above then you can go to AppMgr > Category > System apps > Camera and tap Open to get access to normal camera, panorama and video options.How to root your Kindle Fire HD

If you do decide to smash out of Amazon’s walled garden then you’ll be voiding your warranty, but it will also allow you to access lots of extra content and tweak the device in ways that are impossible with an unrooted Kindle Fire HD. There is always some risk involved in rooting so make sure that you follow instructions to the letter if you’re going to give it a try (it’s not very difficult really). The best place to go for advice and guides on rooting is undoubtedly XDA Developers. You’ll also find APK files and customized ROMs there.More Kindle Fire HDX tips

If you have any Kindle Fire HDX tips or tricks of your own then please post a comment and share them.

From: digitaltrends.com

share medium Helpful Tips and Tricks for Kindle Fire HDX

This article gives the difference between Kindle Fire HDX and Kindle Fire HD.

Amazon has announced that the new Kindle Fire tablets are now available in the UK, following US launch in September, bringing you all the goodness of Amazon in a glossy new device. It’s going under the name Kindle Fire HDX, with that X, you guessed it, meaning it’s packing in more pixels on that display.

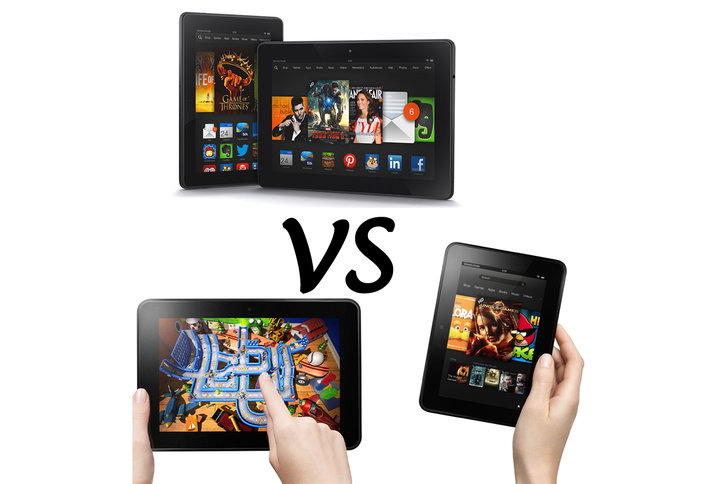
kindle fire hdx and kindle fire hd difference Kindle Fire HDX vs Kindle Fire HD: Whats the difference?

At the same time, Amazon has updated the 7-inch Kindle Fire HD for 2013, while the 8.9-inch Fire HD launched earlier in the year remains untouched.

In this array of Kindle Fire HDs and HDXs, some new, some not, what’s the real difference? With this latest update, what is Amazon changing and should you hold fire, or charge right in?

Displays

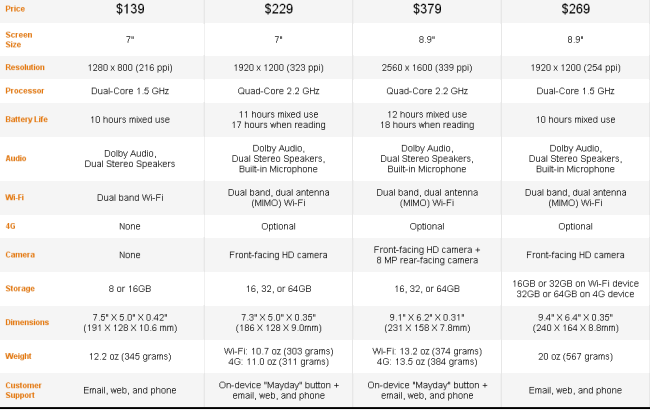
The Amazon Kindle Fire HDX comes in two sizes: 7-inch and 8.9-inch, offering a 1920 x 1200 pixel resolution display (323ppi) on the 7-inch and 2560 x 1600 (339ppi) on the 8.9-inch. At that resolution, the 8.9-inch HDX has the sharpest display around, while the new 7-inch HDX matches the Nexus 7 (2013) for pixels.

The Kindle Fire HD (2013) – that’s the new version – has a 7-inch 1280 x 800 (216ppi) display, whilst the Fire HD 8.9-inch has a 1920 x 1200 (254ppi) display. Naturally, the higher pixel density displays of the HDX will give you more detail, with the 8.9-inch HDX looking like the real star in the pack.

Power and battery

The Kindle Fire HDX models have a 2.2GHz quad-core Snapdragon 800 processor, the same sort of thing as you’ll find in the LG G2 or Samsung Galaxy Note 3. That means oodles of power on offer on both the 7-inch and 8.9-inch models, both with 2GB of RAM.

The Kindle Fire HD models both at 7 and 8.9-inches settle for a 1.5GHz dual-core processor. The HDX will be faster, but Amazon also reports that the Kindle Fire HDX will offer slightly longer battery life. Not bad considering the step-up in display and power. It’s aided by a new software feature designed for reading, which shuts down non-essential hardware to extend the battery to 17 hours if reading alone.

Cameras

The camera isn’t the most important part of a tablet in our opinion, but you still see a large number of people using them to take photos: the Kindle Fire range hasn’t had a rear camera until now. The Kindle Fire HDX 8.9 has a rear 8-megapixel camera, as well as a front-facing camera.
Both the Kindle Fire HD 8.9 and the new Kindle Fire HDX 7-inch offer front-facing cameras, while the new 7-inch Kindle Fire HD (2013) has no camera at all.
Connectivity

Kindle is known for being well connected and the wide range of clever features, like Whispersync, that come with it. The new 7-inch Kindle Fire HD (2013) is the only model without the option for 4G. It also misses out on the dual-antenna Wi-Fi that the others offer. If connectivity is key, so you might want to avoid the 7-inch Kindle Fire HD and pick one of the others.

Software

The Kindle Fire HDX and 7-inch Kindle Fire HD (2013) debut with the latest Fire OS3 software. The Kindle Fire HD 8.9 doesn’t have that update and there’s no word on if it will.

Fire OS3 brings a range of features to the Kindle Fire HD and HDX family, including a new Mayday button for instant customer service support, second screen features, better touch response, X-Ray for music, a new reading mode that powers down hardware that’s not needed to extend the battery life and much more.

Size and weight

Weight is an important factor for tablets, especially if you’re going to be lying in bed holding it while watching Breaking Bad on Netflix. The lightest of the lot is the 7-inch Kindle Fire HDX with Wi-Fi at 303g. The heaviest is the old 8.9-inch Kindle Fire HD. Weighing in at 567g, that’s going to be a real strain on your wrist after a while.

The 8.9 Kindle Fire HDX comes in at 374g, which is impressive. It’s also only 7.8mm thick, making it the slimmest of the bunch. It’s a whole 278g lighter than the iPad.

Compare Kindle Fire tablets:

kindle fire compare Kindle Fire HDX vs Kindle Fire HD: Whats the difference?
campare kindle fire Kindle Fire HDX vs Kindle Fire HD: Whats the difference?

Summary

There’s a wide range of options available in the Kindle Fire HD family now. The HDX models obviously bring the advantages of more power and more pixels. If you’re looking at gaming on your Kindle Fire, the power-hungry games like Real Racing 3 will load faster and you’ll squeeze out more detail. The Kindle Fire HDX is what you want.

If you’re looking for something for casual browsing at home, then the Kindle Fire HD might save you a few bucks. But bear in mind, the 8.9-inch Kindle Fire HD, is much more weighty than the HDX – if you’re going to be holding it up to view, then you might want to find a little more cash for the top model.

The Kindle Fire HD 7-inch (2013) starts at $139/£119, the Fire HD 8.9-inch starts at $269/£229. The Kindle Fire HDX 7-inch starts at $229/£199, the HDX 8.9-inch is $379/£329.

More Related:

Play MKV, AVI, VOB, Tivo, WMV, MPG, FLV, F4V on Kindle Fire HDX 7
Put and play new released Blu-ray/DVD movies on Kindle Fire HDX 7
Get DRM protected Digital Copy onto Kindle Fire HDX 8.9
Sync iTunes movies to Kindle Fire HDX
Kindle Fire HDX File Transfer

share medium Kindle Fire HDX vs Kindle Fire HD: Whats the difference?